
Most small businesses share many different links: an Instagram page, a Facebook page, a WhatsApp number, a website and a payment ID. Customers get confused and some of them never reach the page they need.
The Bio Linktree module in DataBridge CRM fixes this. You build one business page that gathers all your links and products under a single address. This post explains what the module does and how to set it up.
What is the Bio Linktree module?
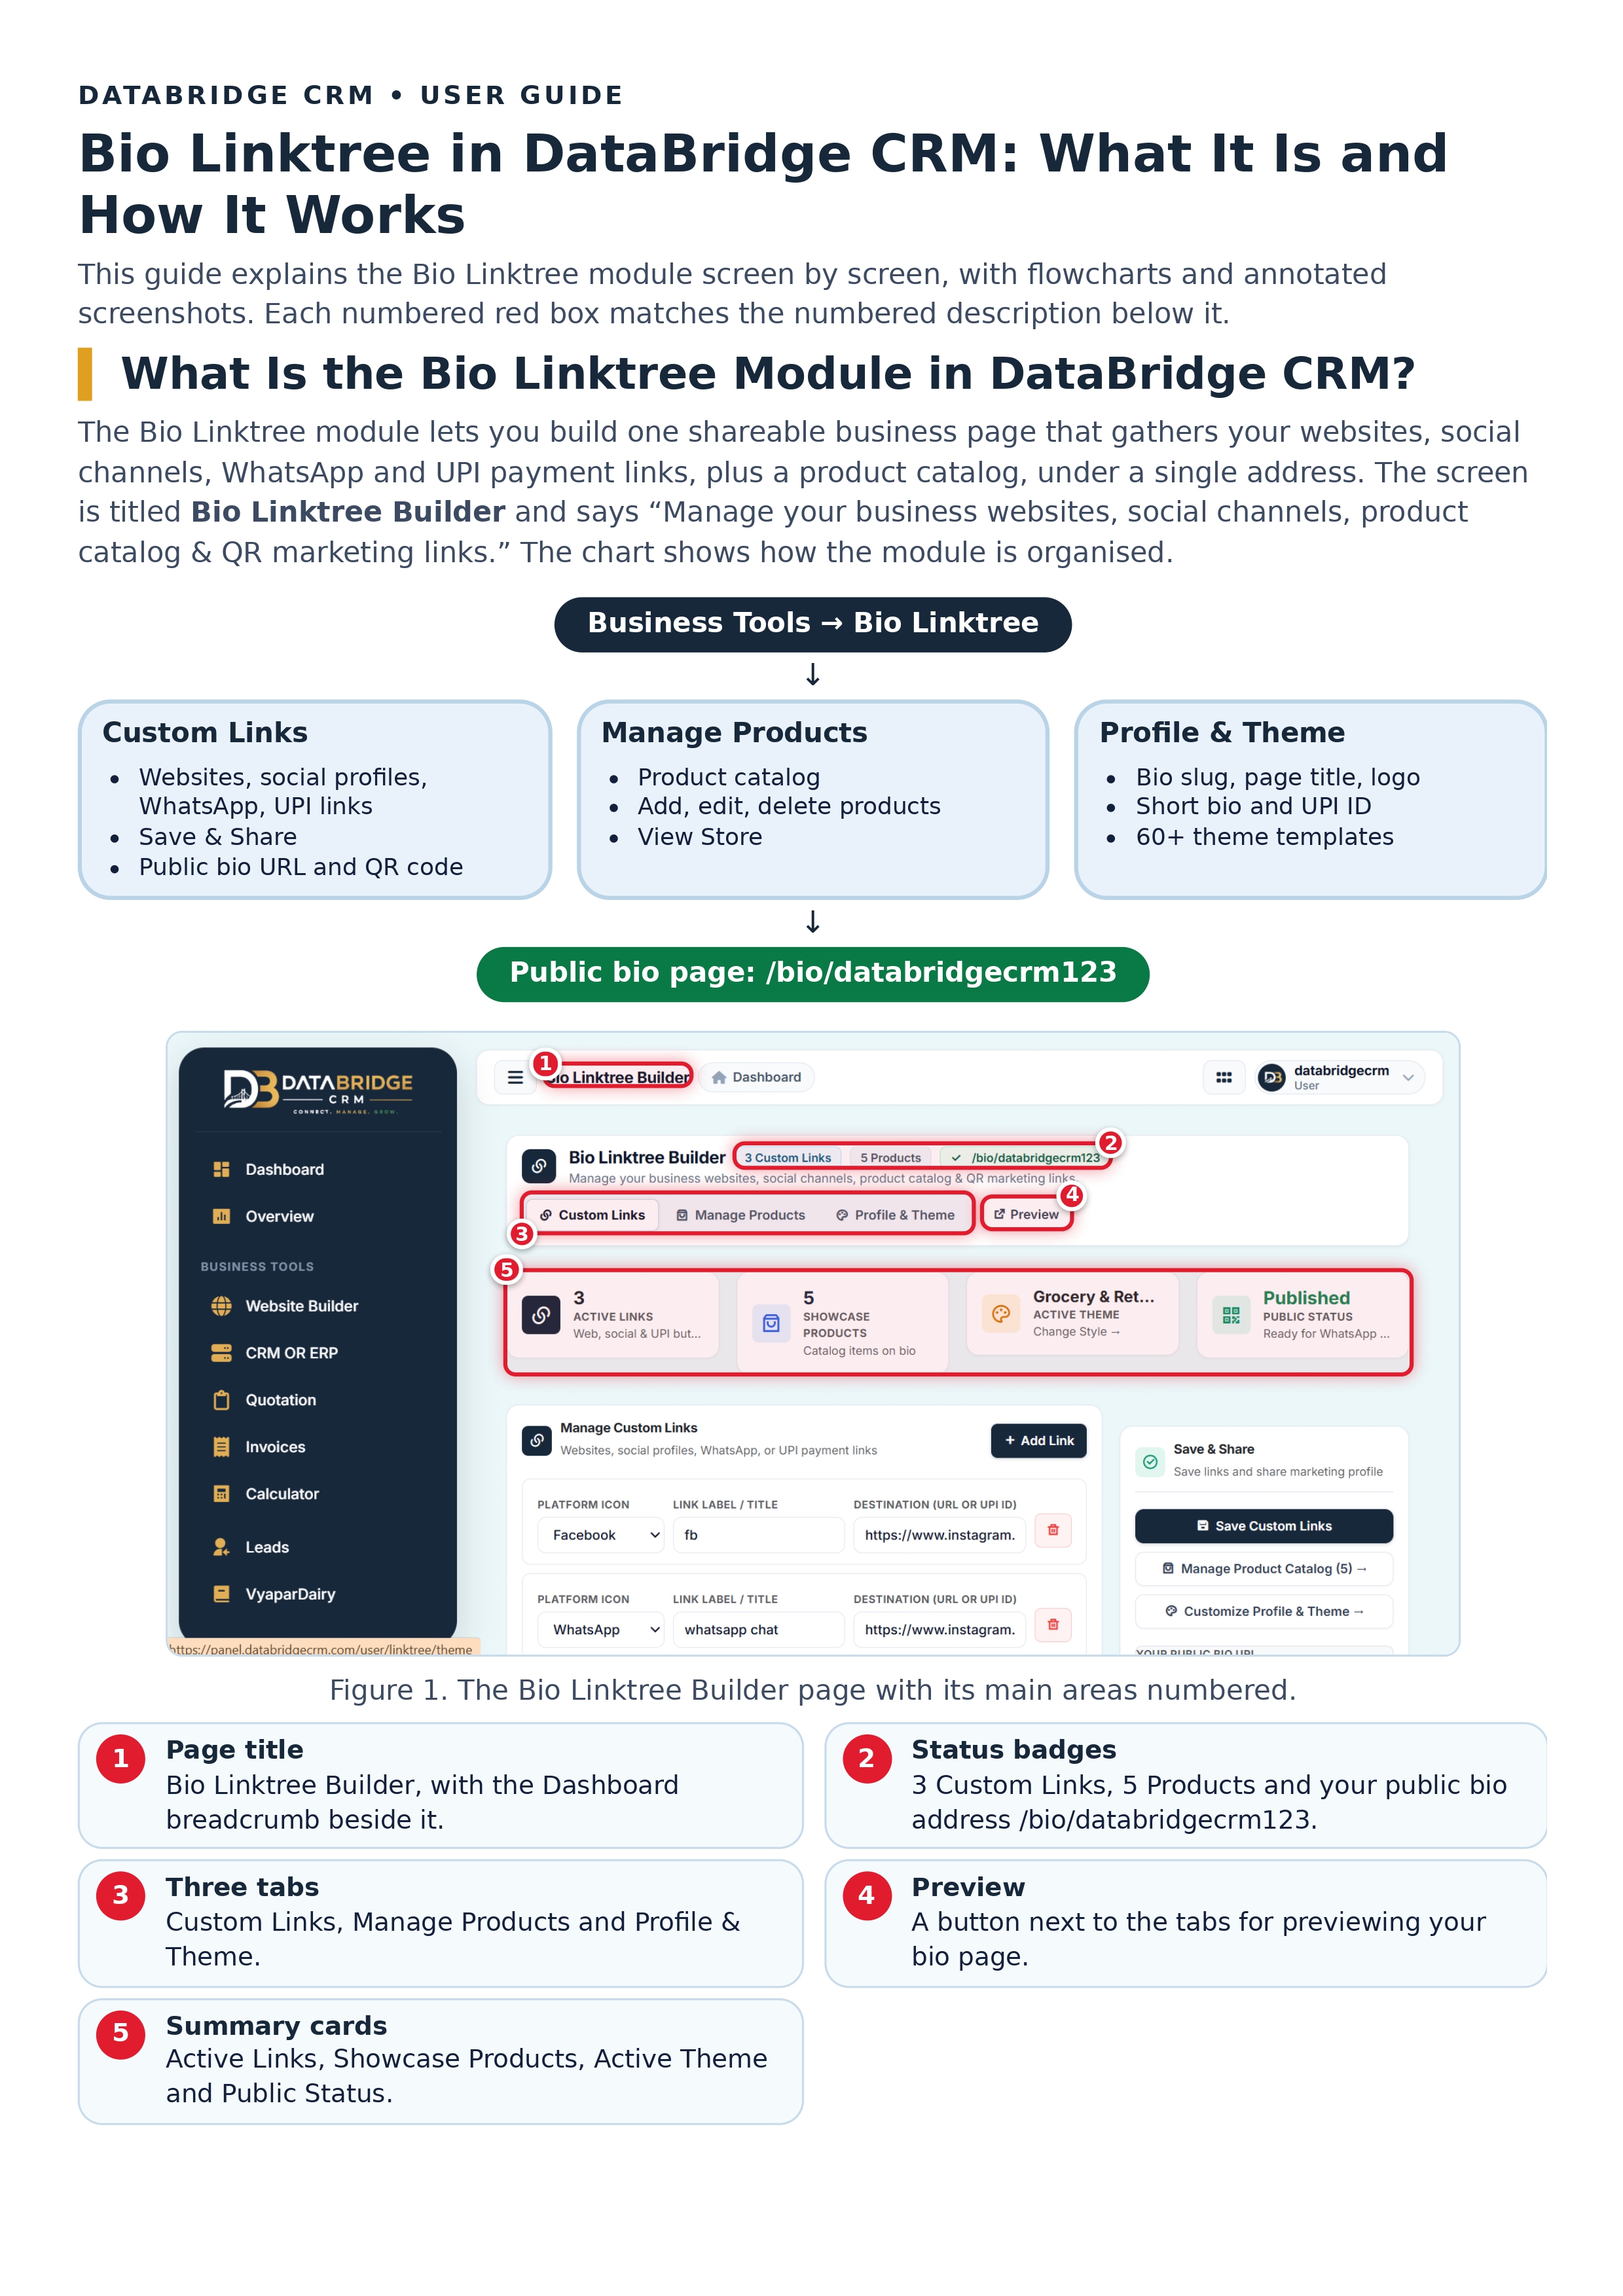
Bio Linktree is a tool inside DataBridge CRM, found under Business Tools in the left menu. The screen is called Bio Linktree Builder. It helps you “manage your business websites, social channels, product catalog & QR marketing links.”
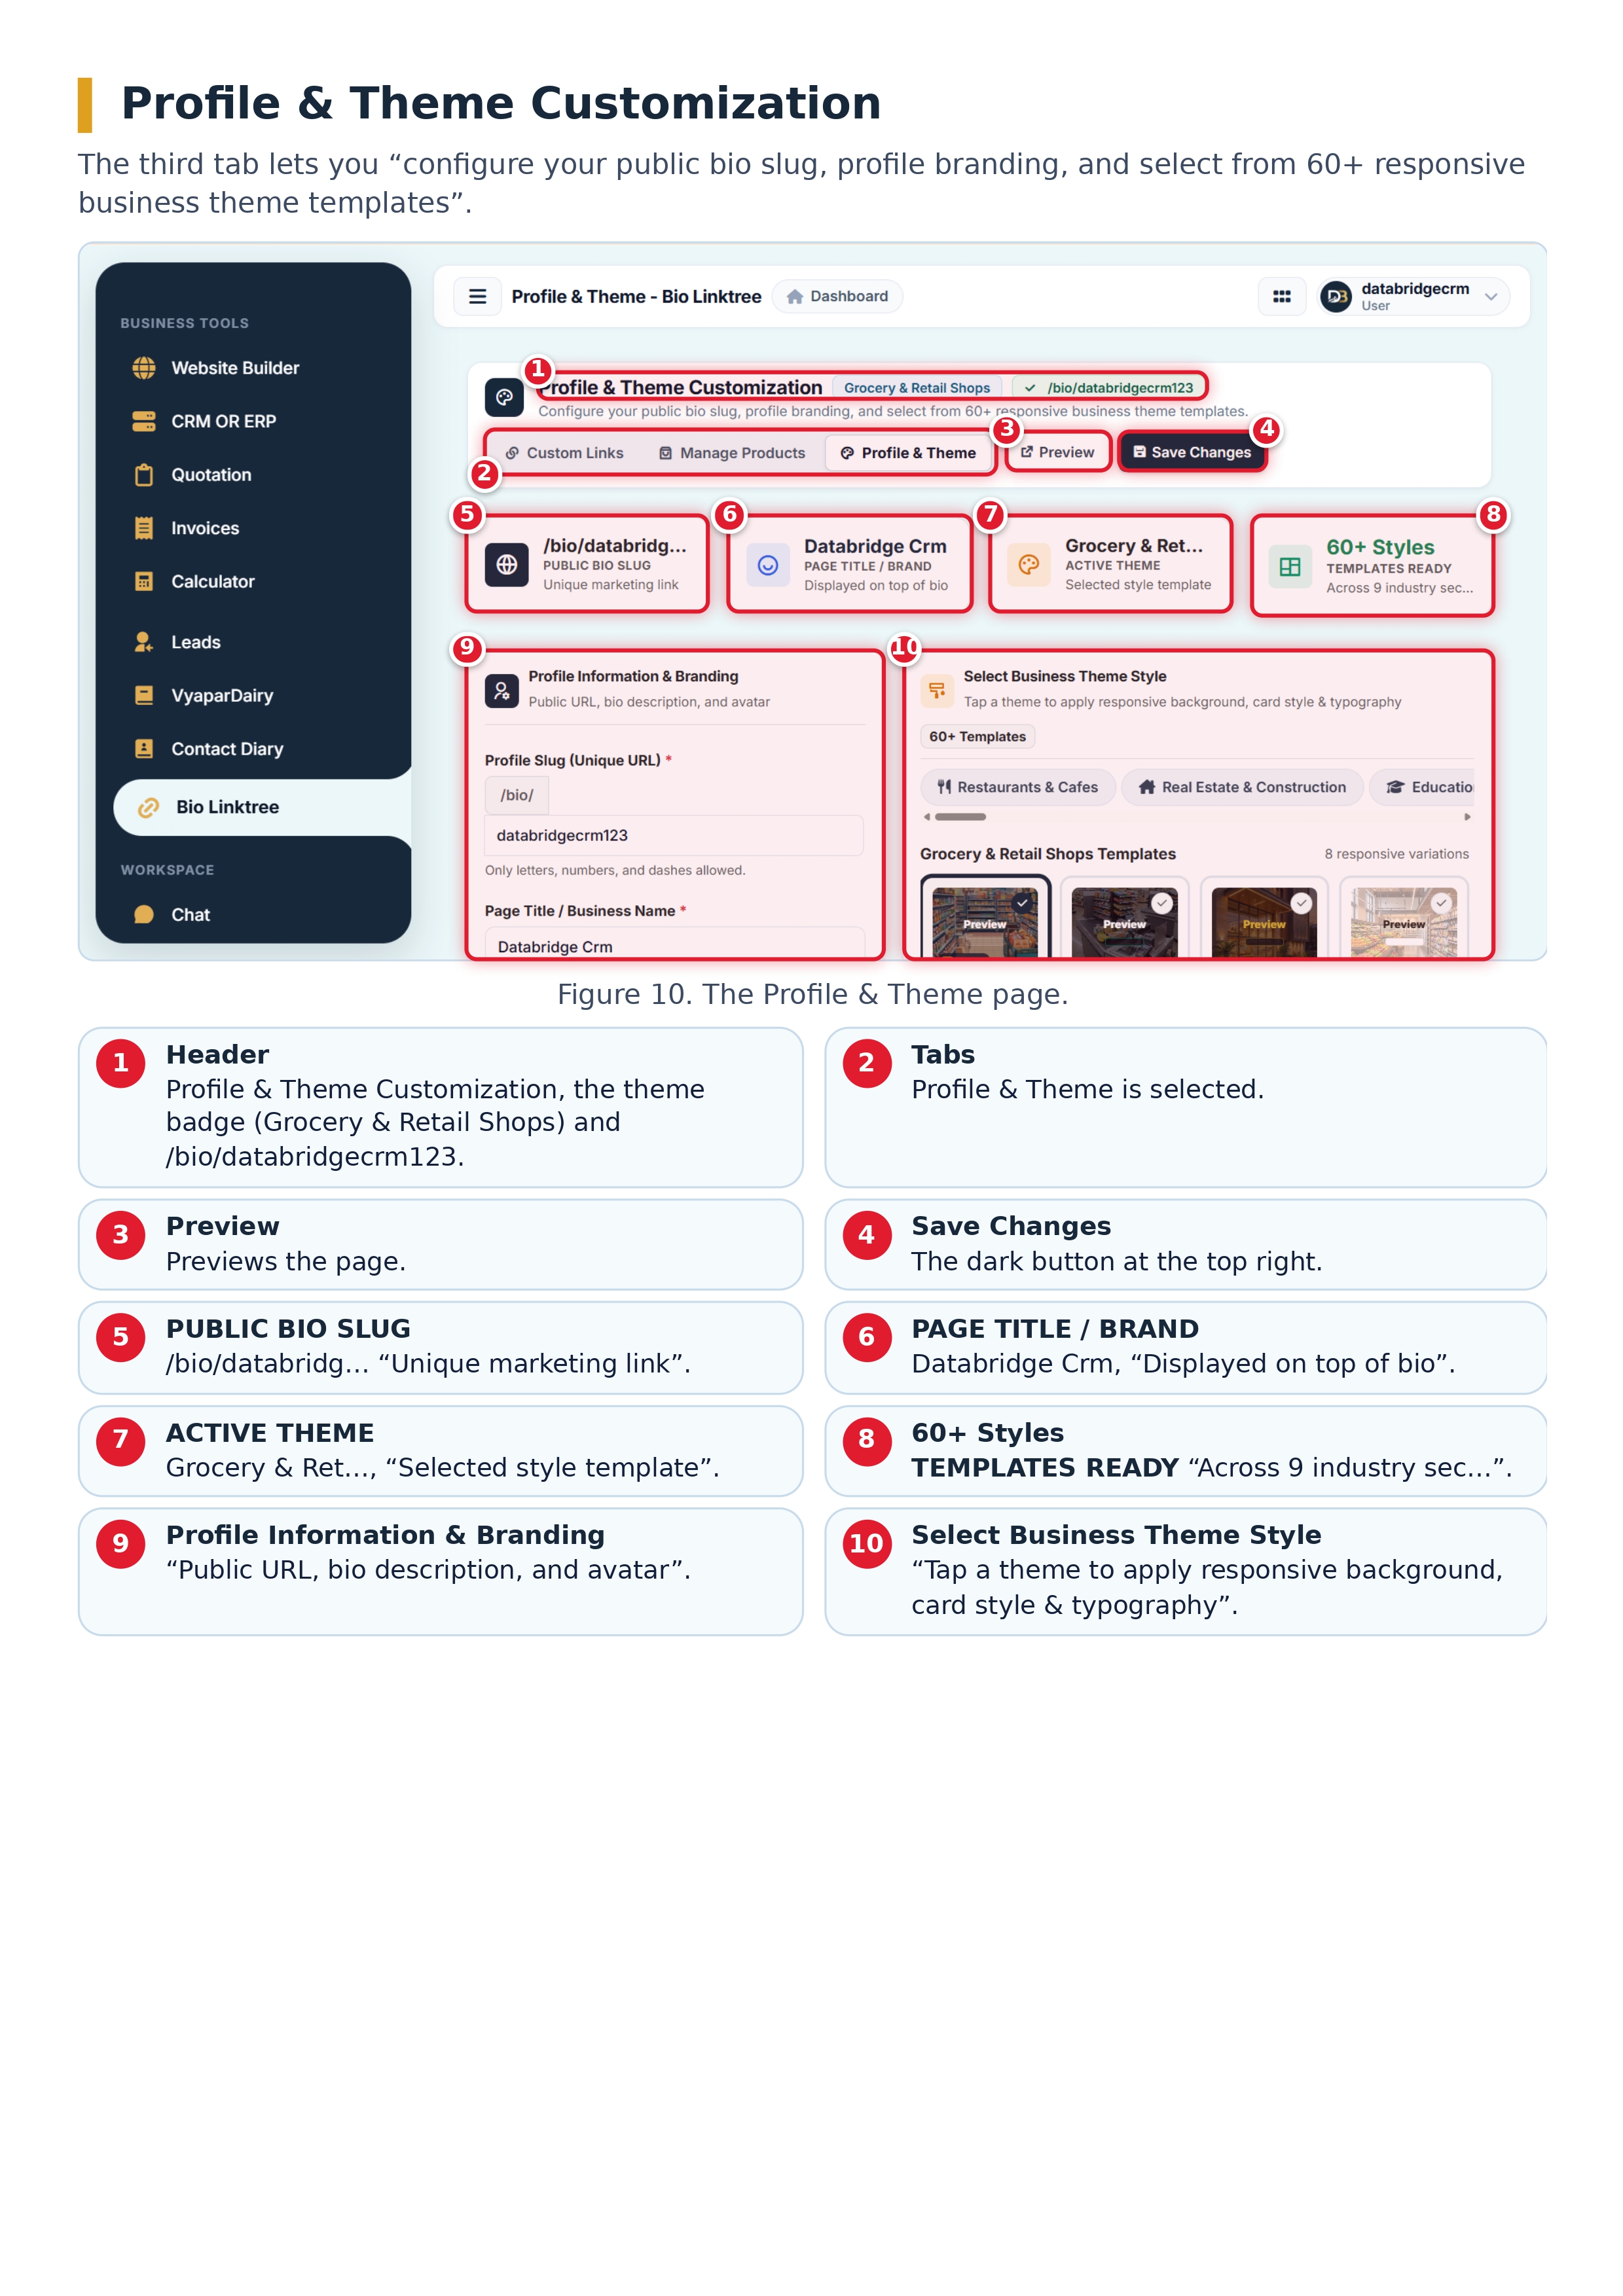
The module has three tabs:
- Custom Links: your websites, social profiles, WhatsApp and UPI links.
- Manage Products: your product catalog.
- Profile & Theme: your page address, brand details and design.
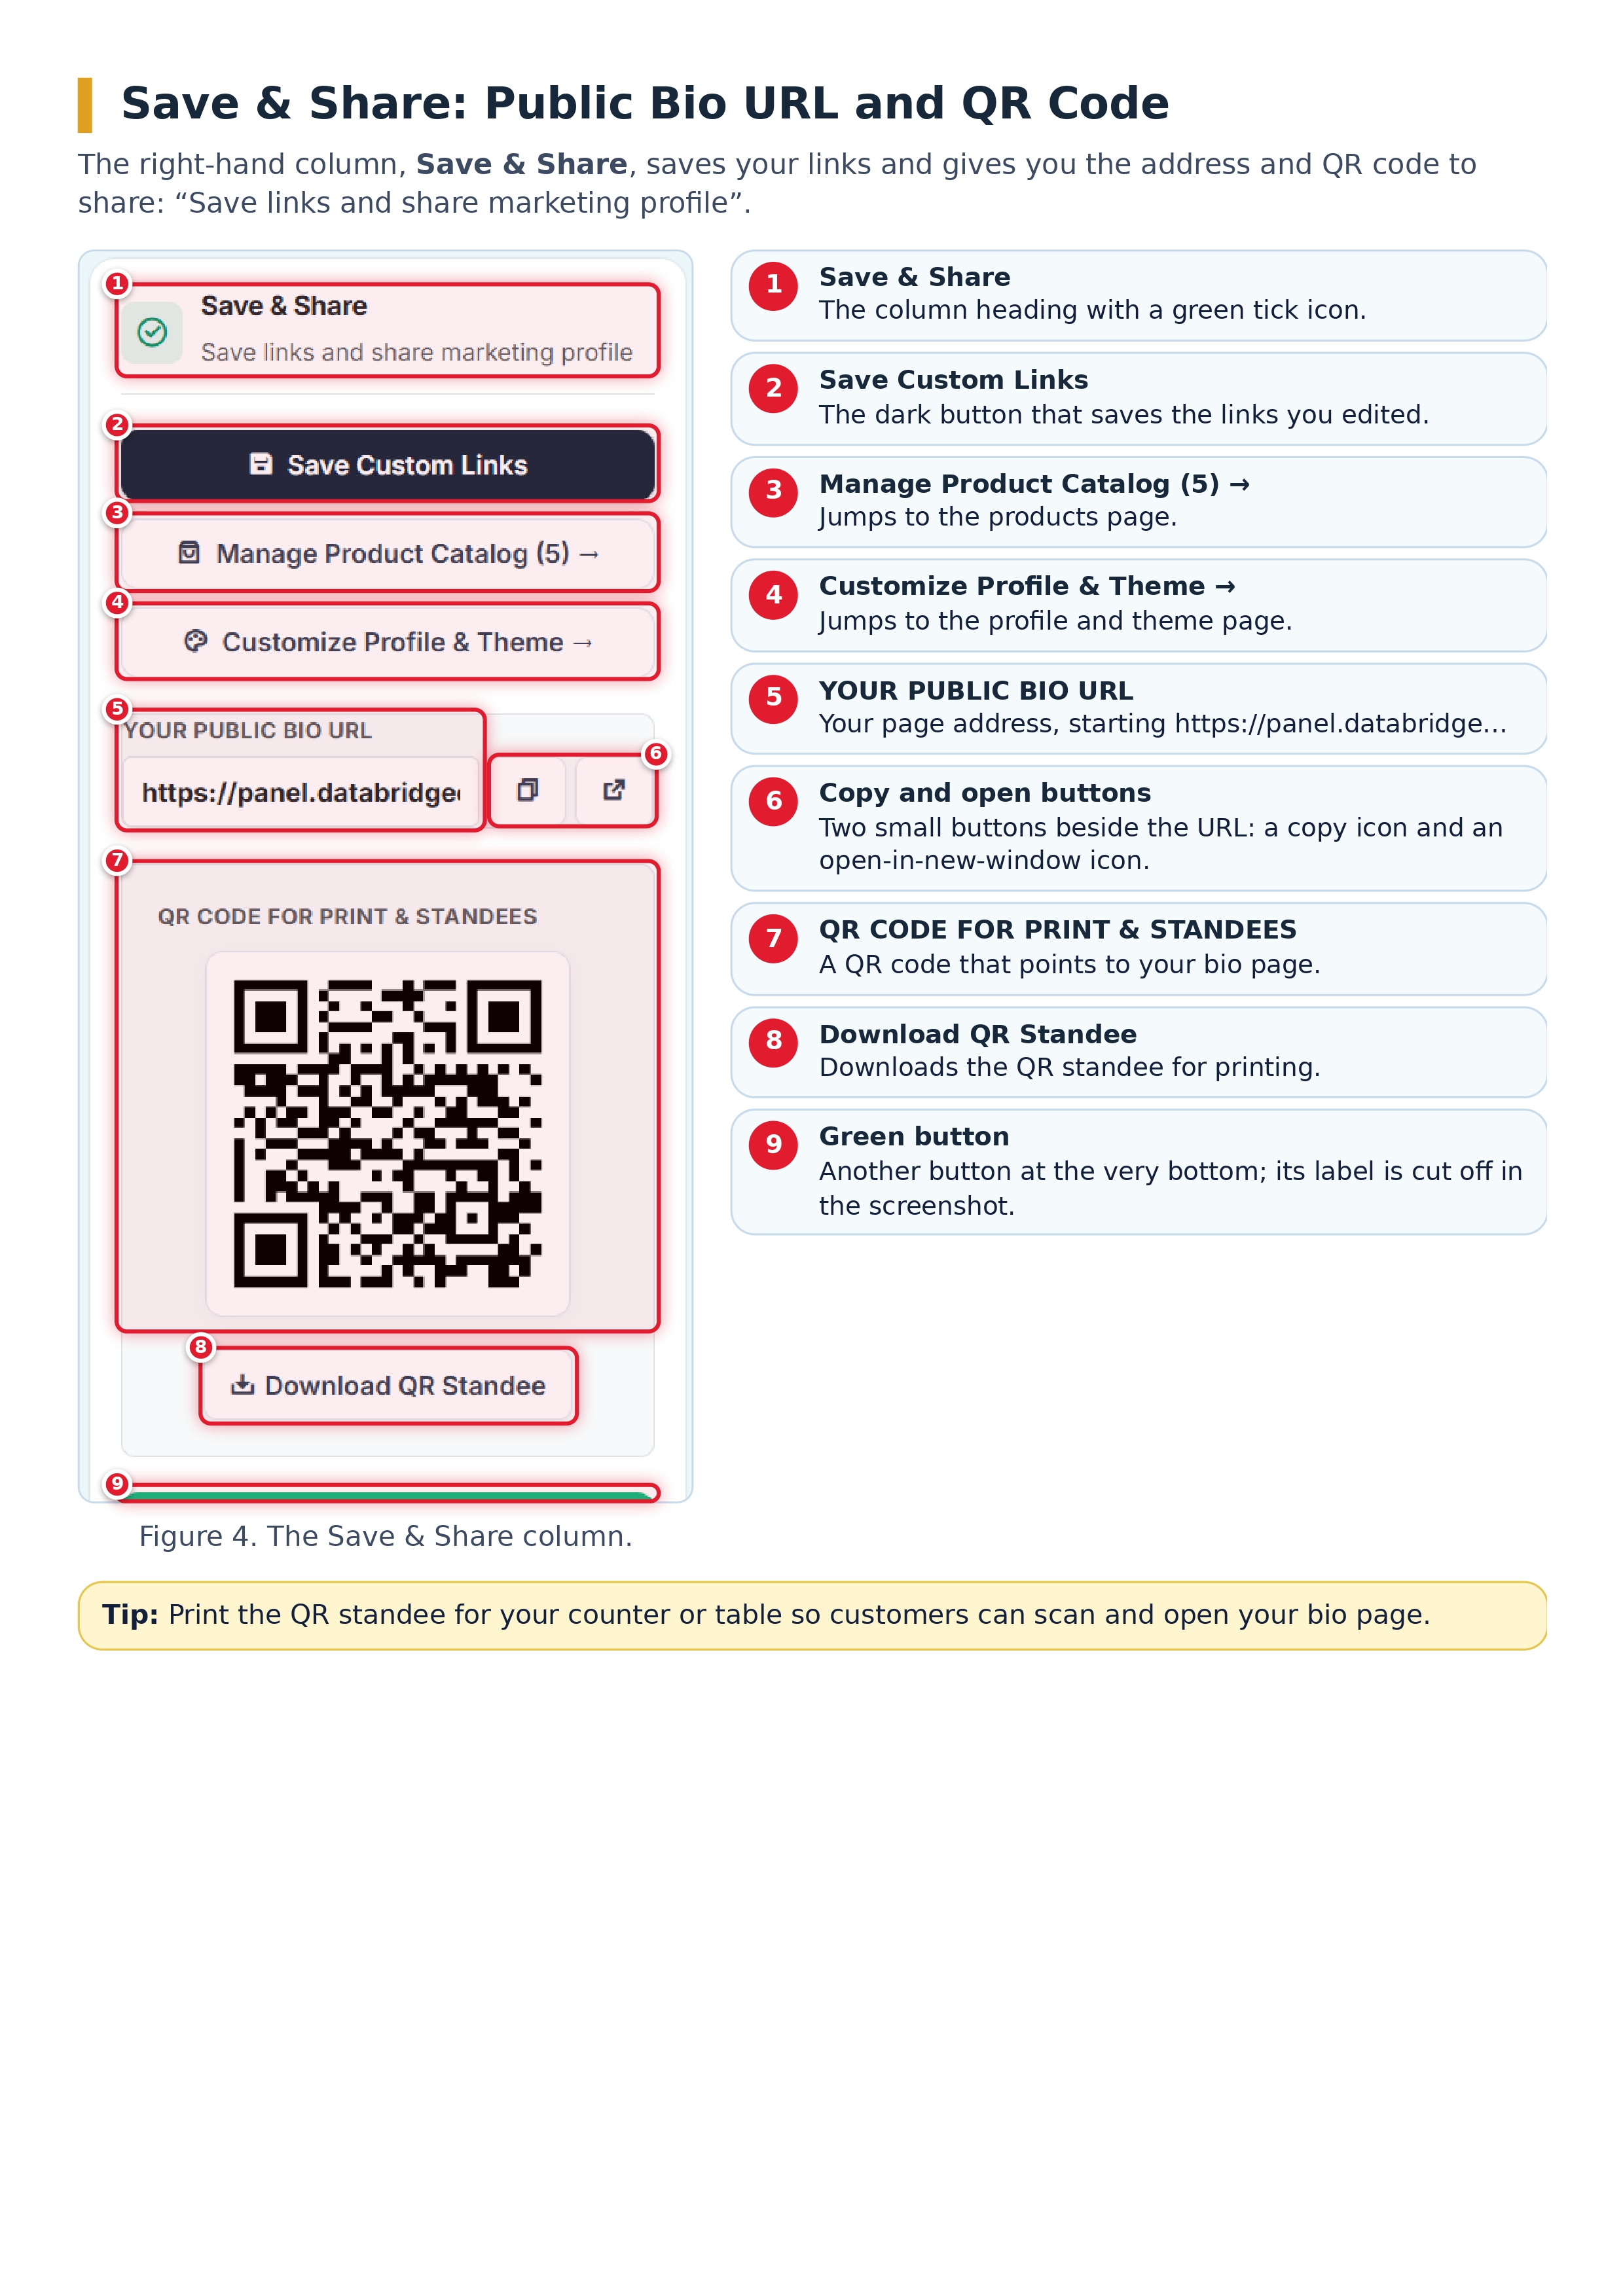
Your finished page lives at an address like /bio/databridgecrm123, and the module gives you a QR code and a WhatsApp share option for it.
Four cards that show your status
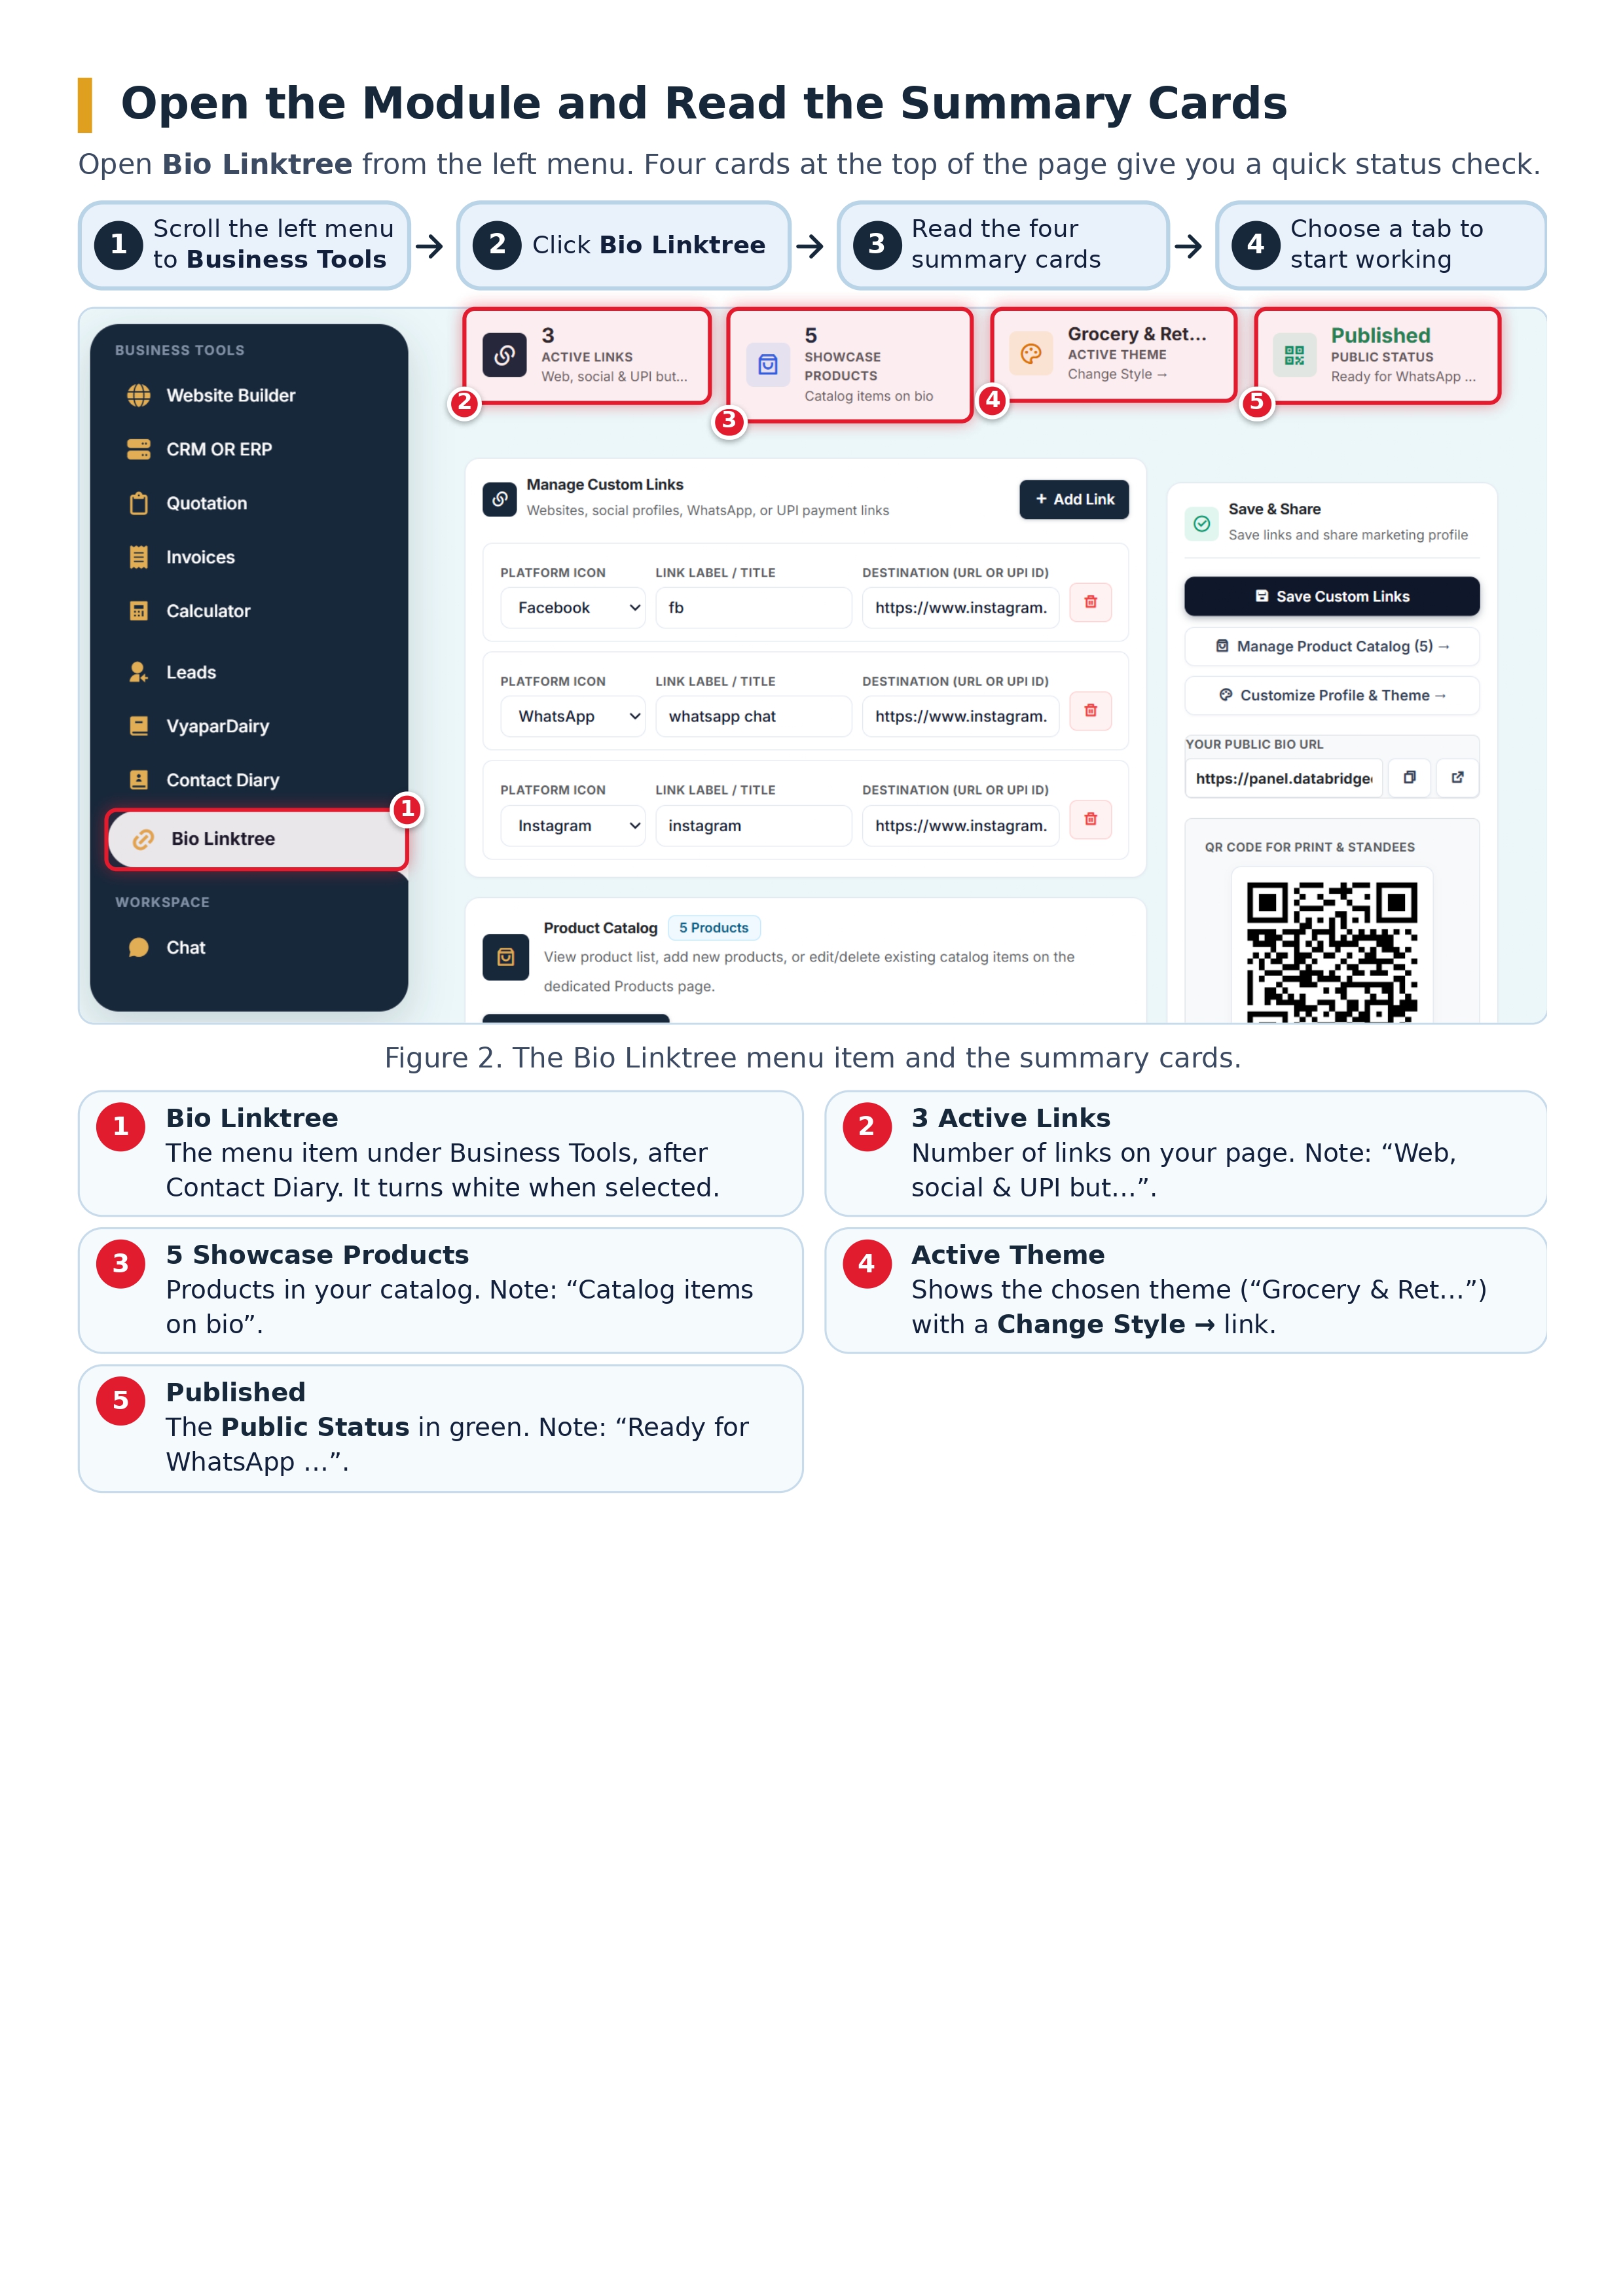
At the top of the page, four cards give a quick summary:
- Active Links: how many links are on your page (3 in the example).
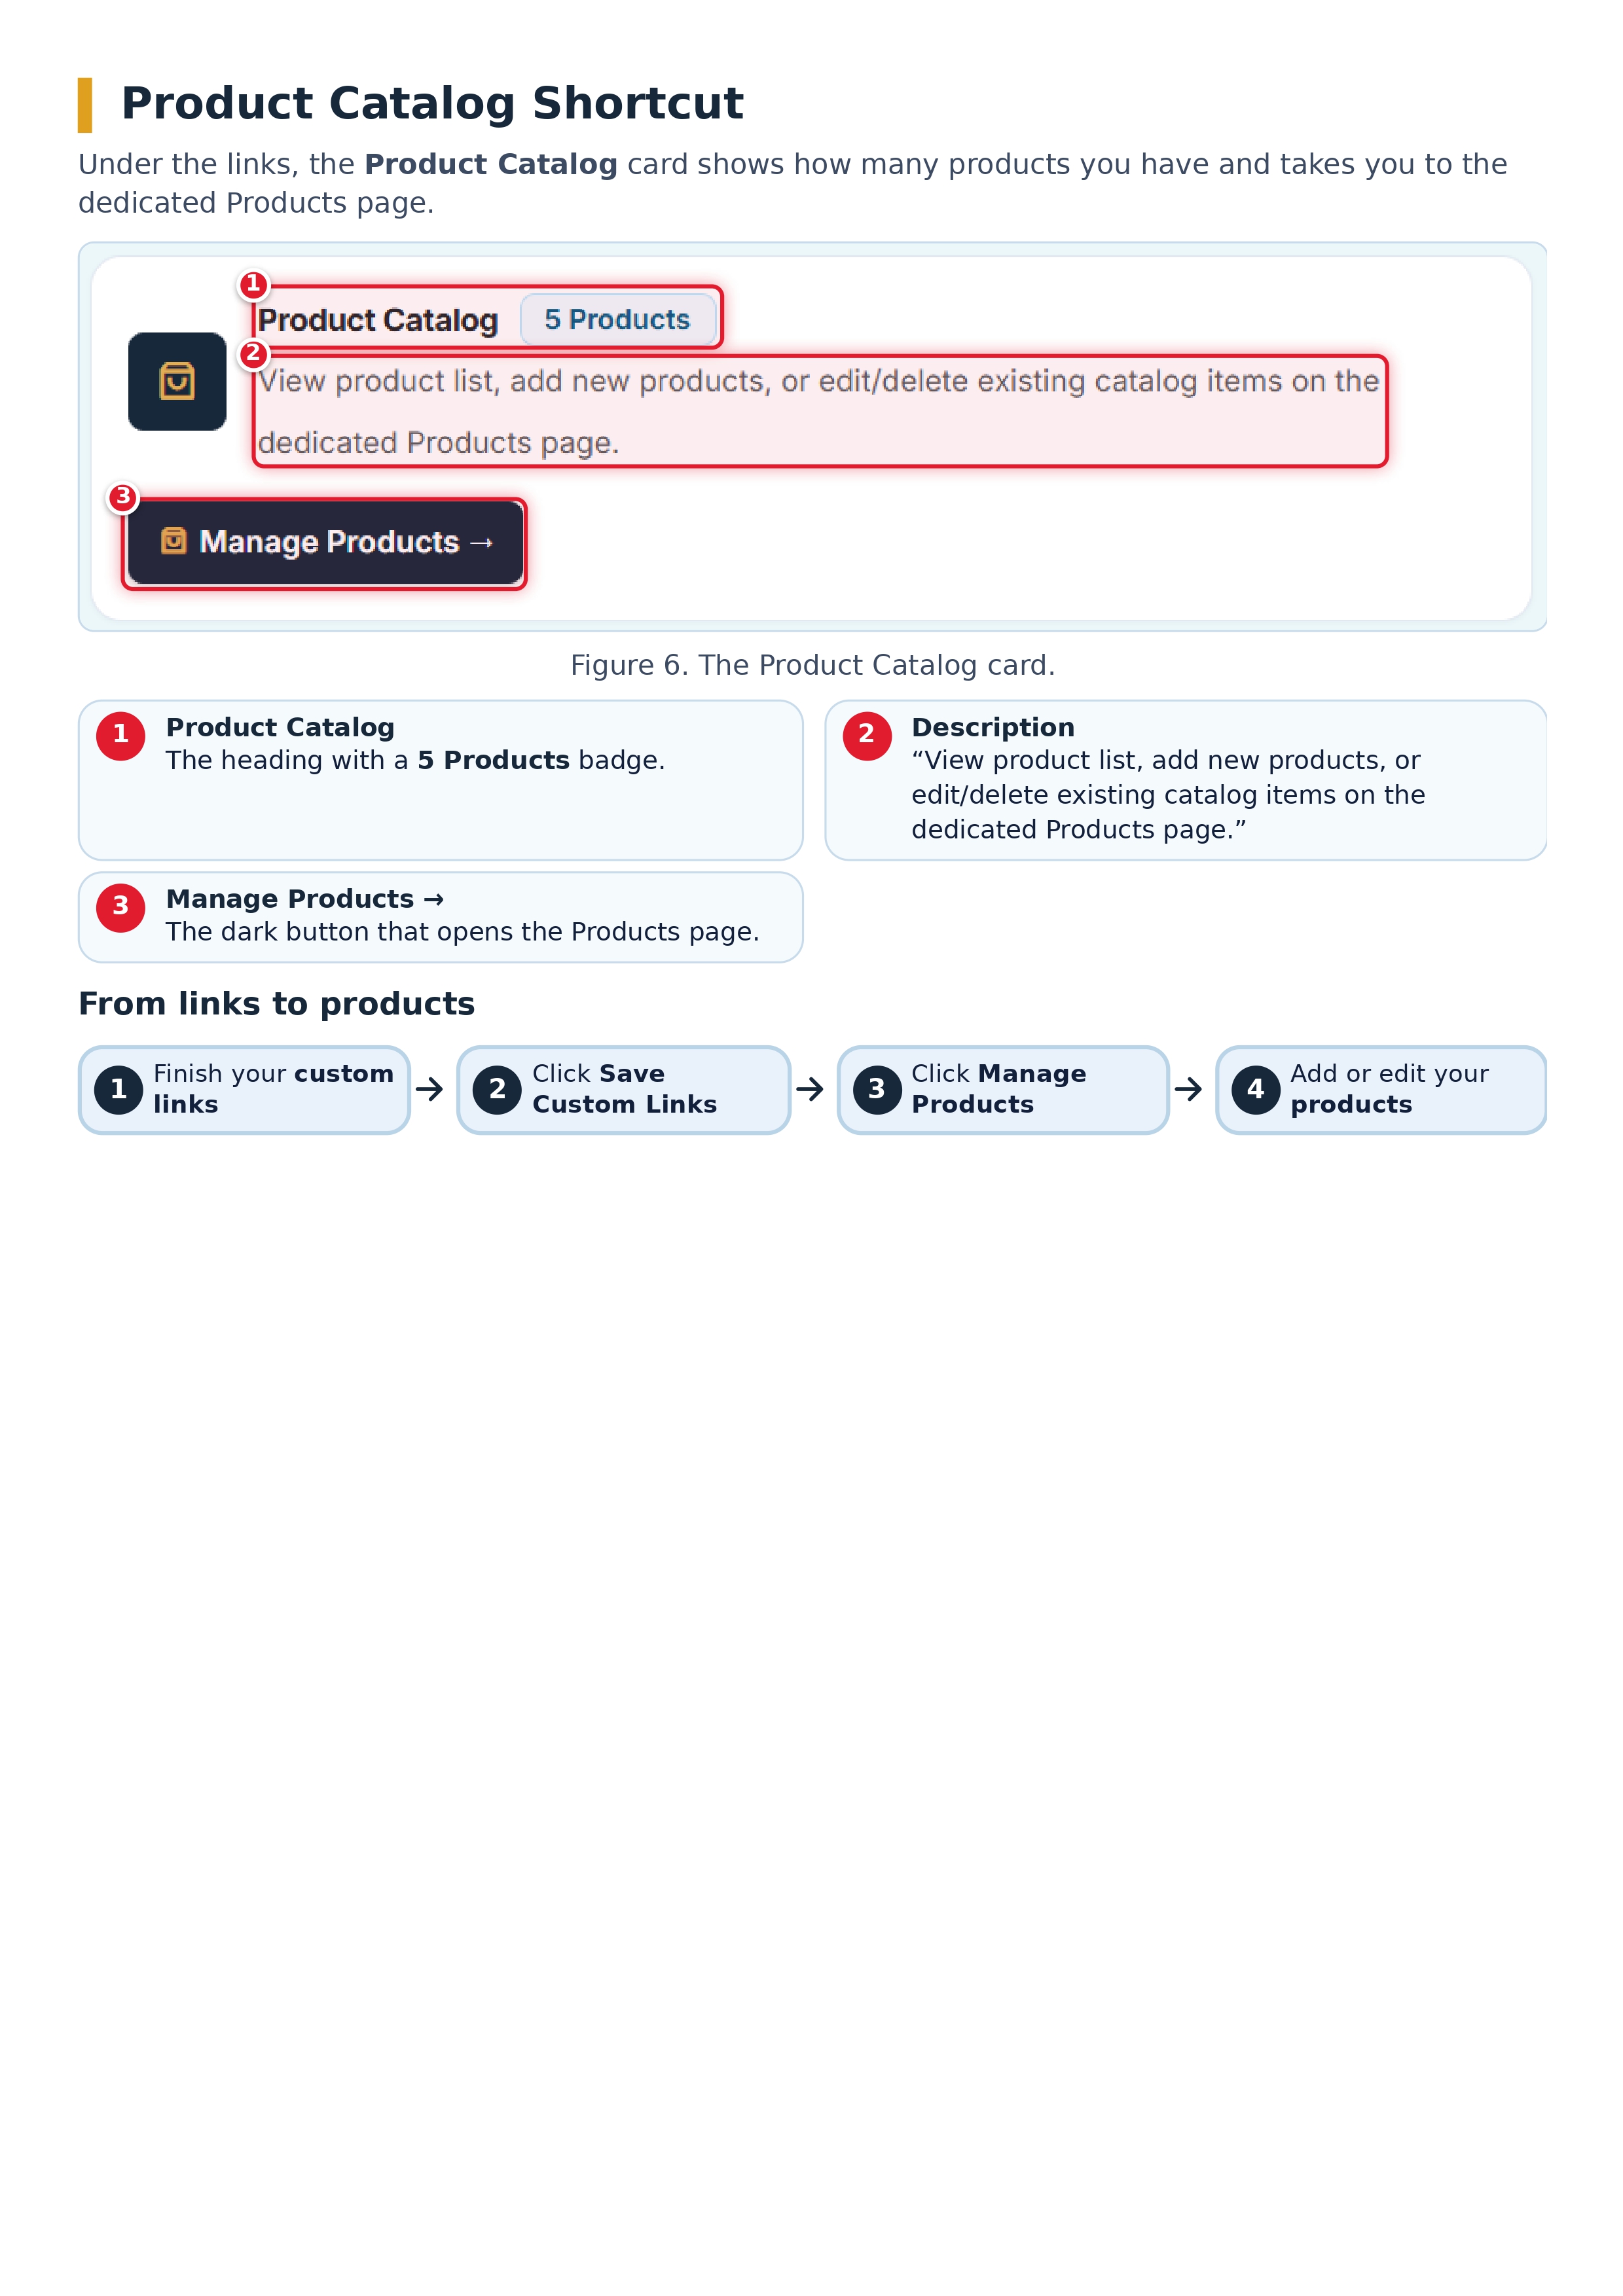
- Showcase Products: how many catalog items appear on your bio (5 in the example).
- Active Theme: your current design, with a Change Style link.
- Public Status: shows Published when your page is live.
Step 1: Add your custom links
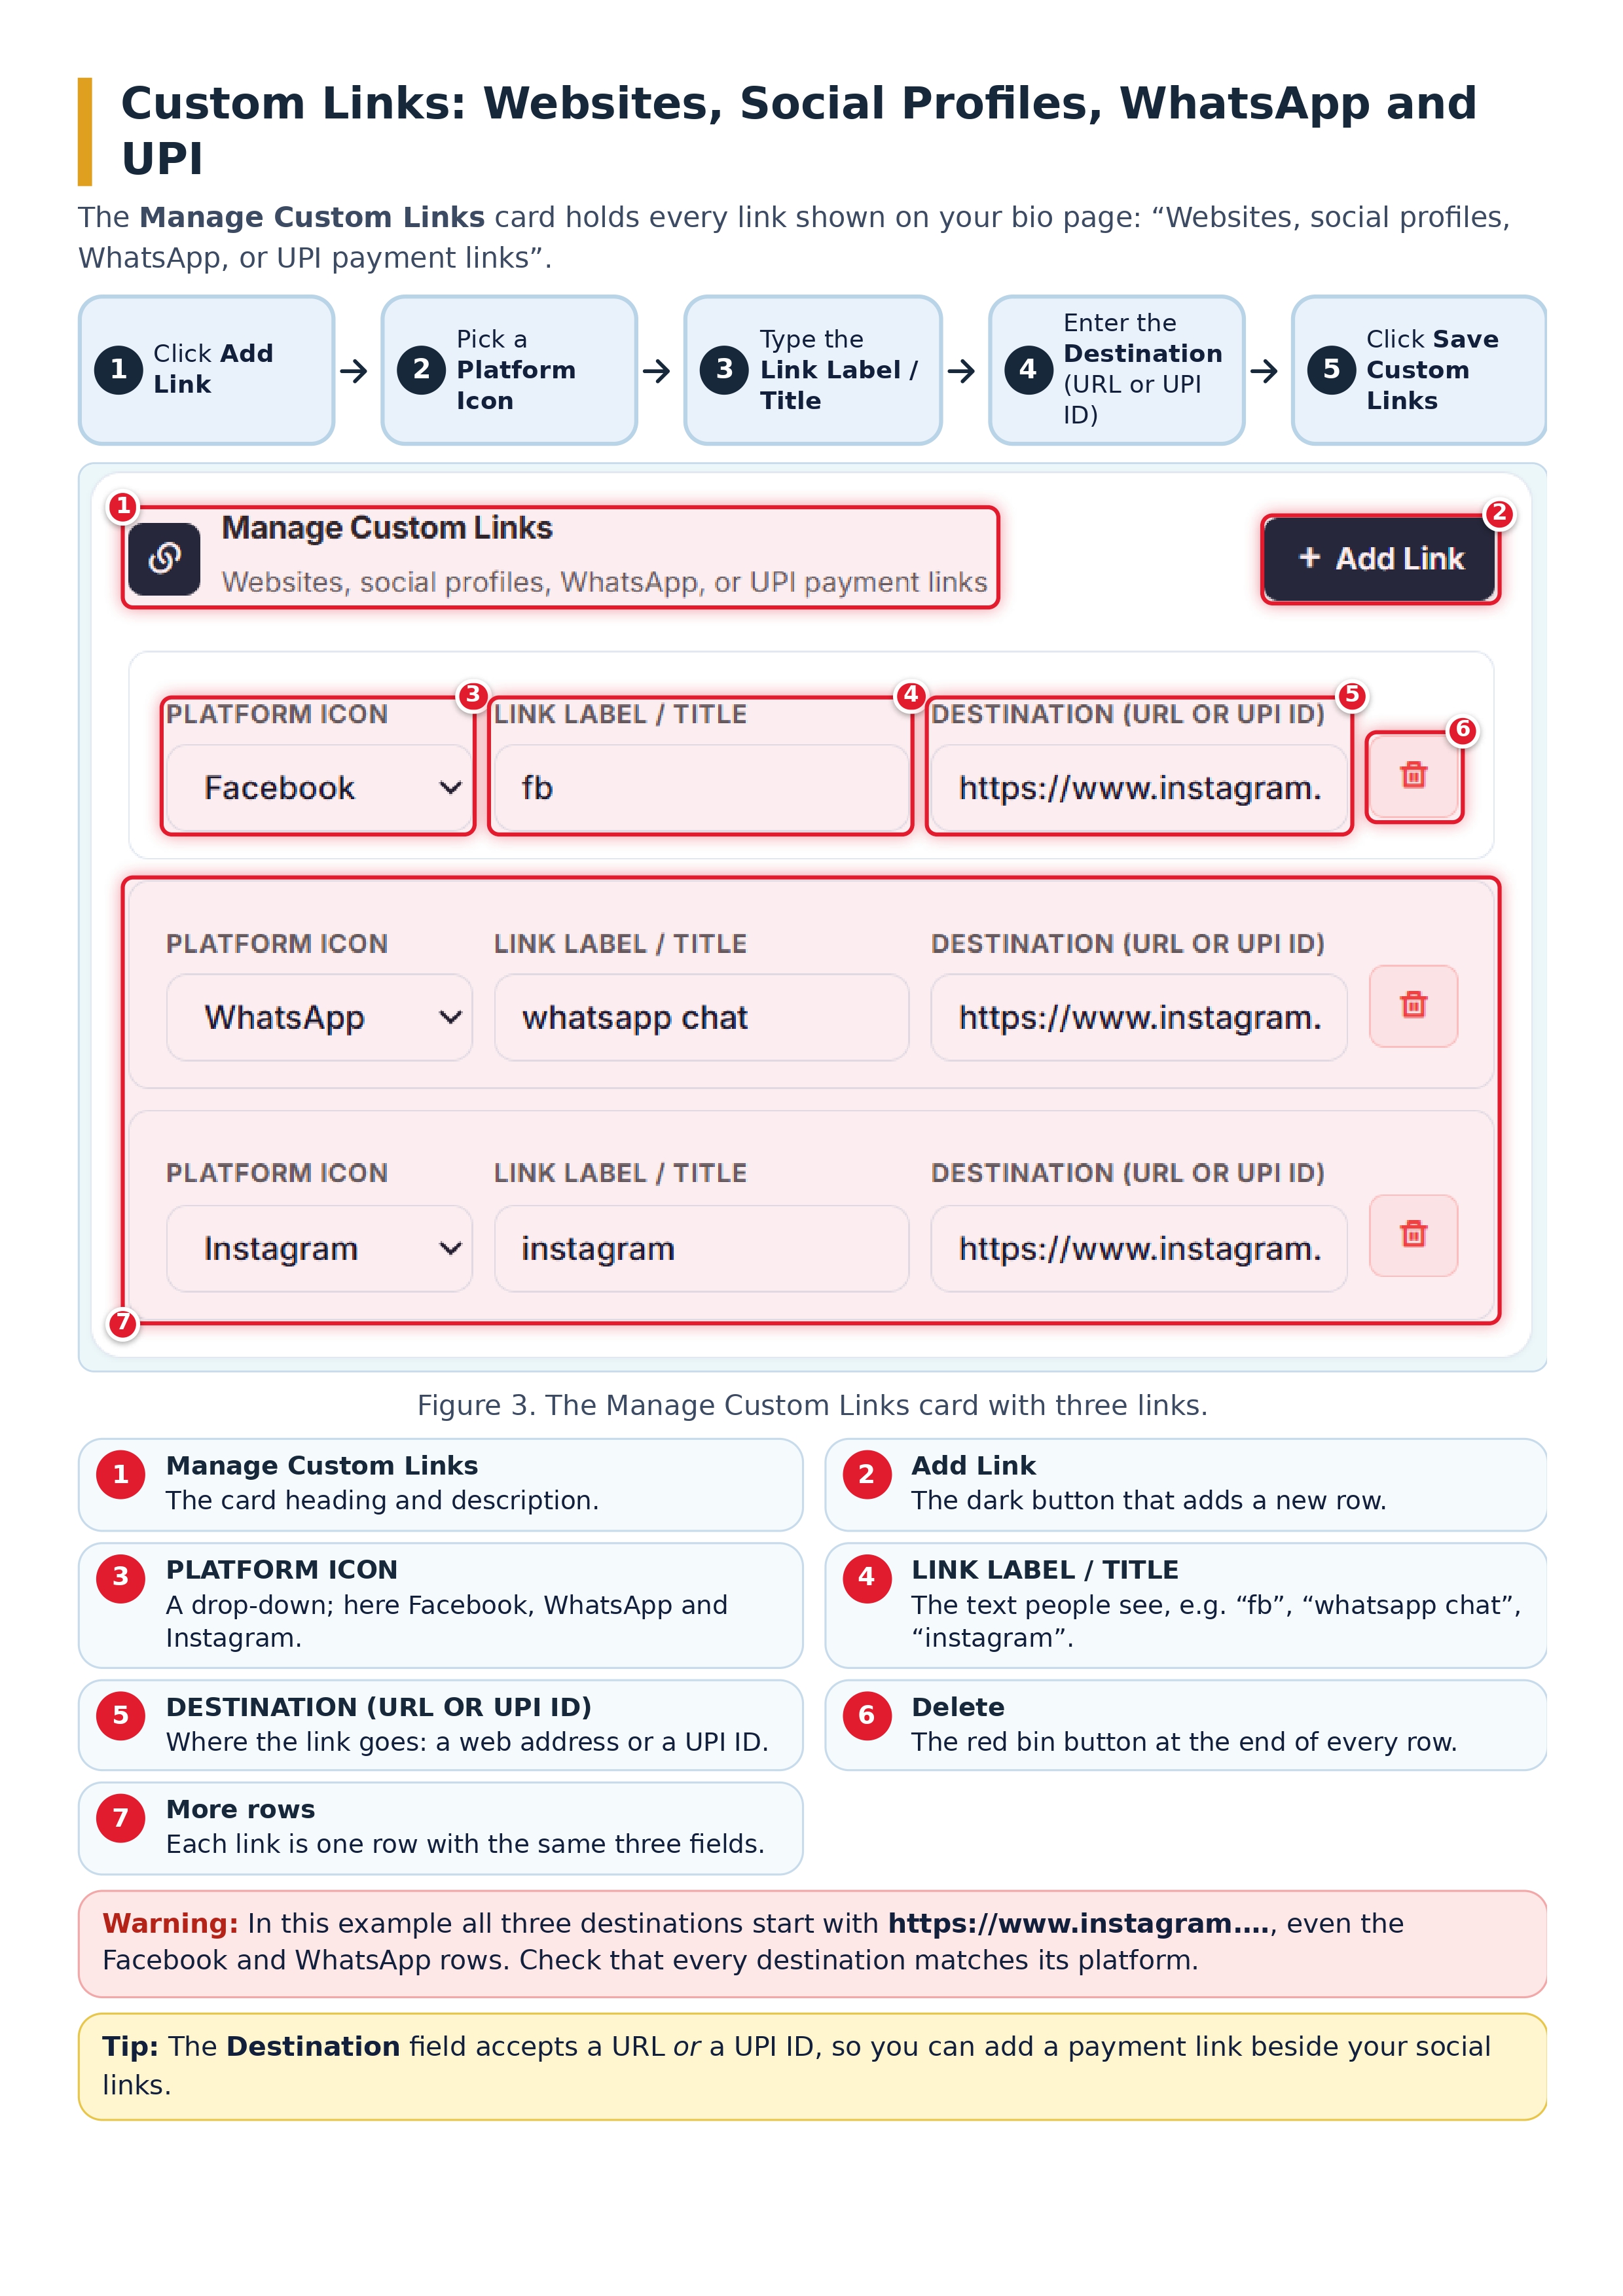
The Manage Custom Links card holds all your links. Each link is one row with three fields:
- Platform Icon: a drop-down such as Facebook, WhatsApp or Instagram.
- Link Label / Title: the name visitors see.
- Destination (URL or UPI ID): where the link goes.
Click Add Link for a new row, and the red bin button deletes a row. Because the destination can be a URL or a UPI ID, you can put a payment option next to your social links.
Share your page on WhatsApp
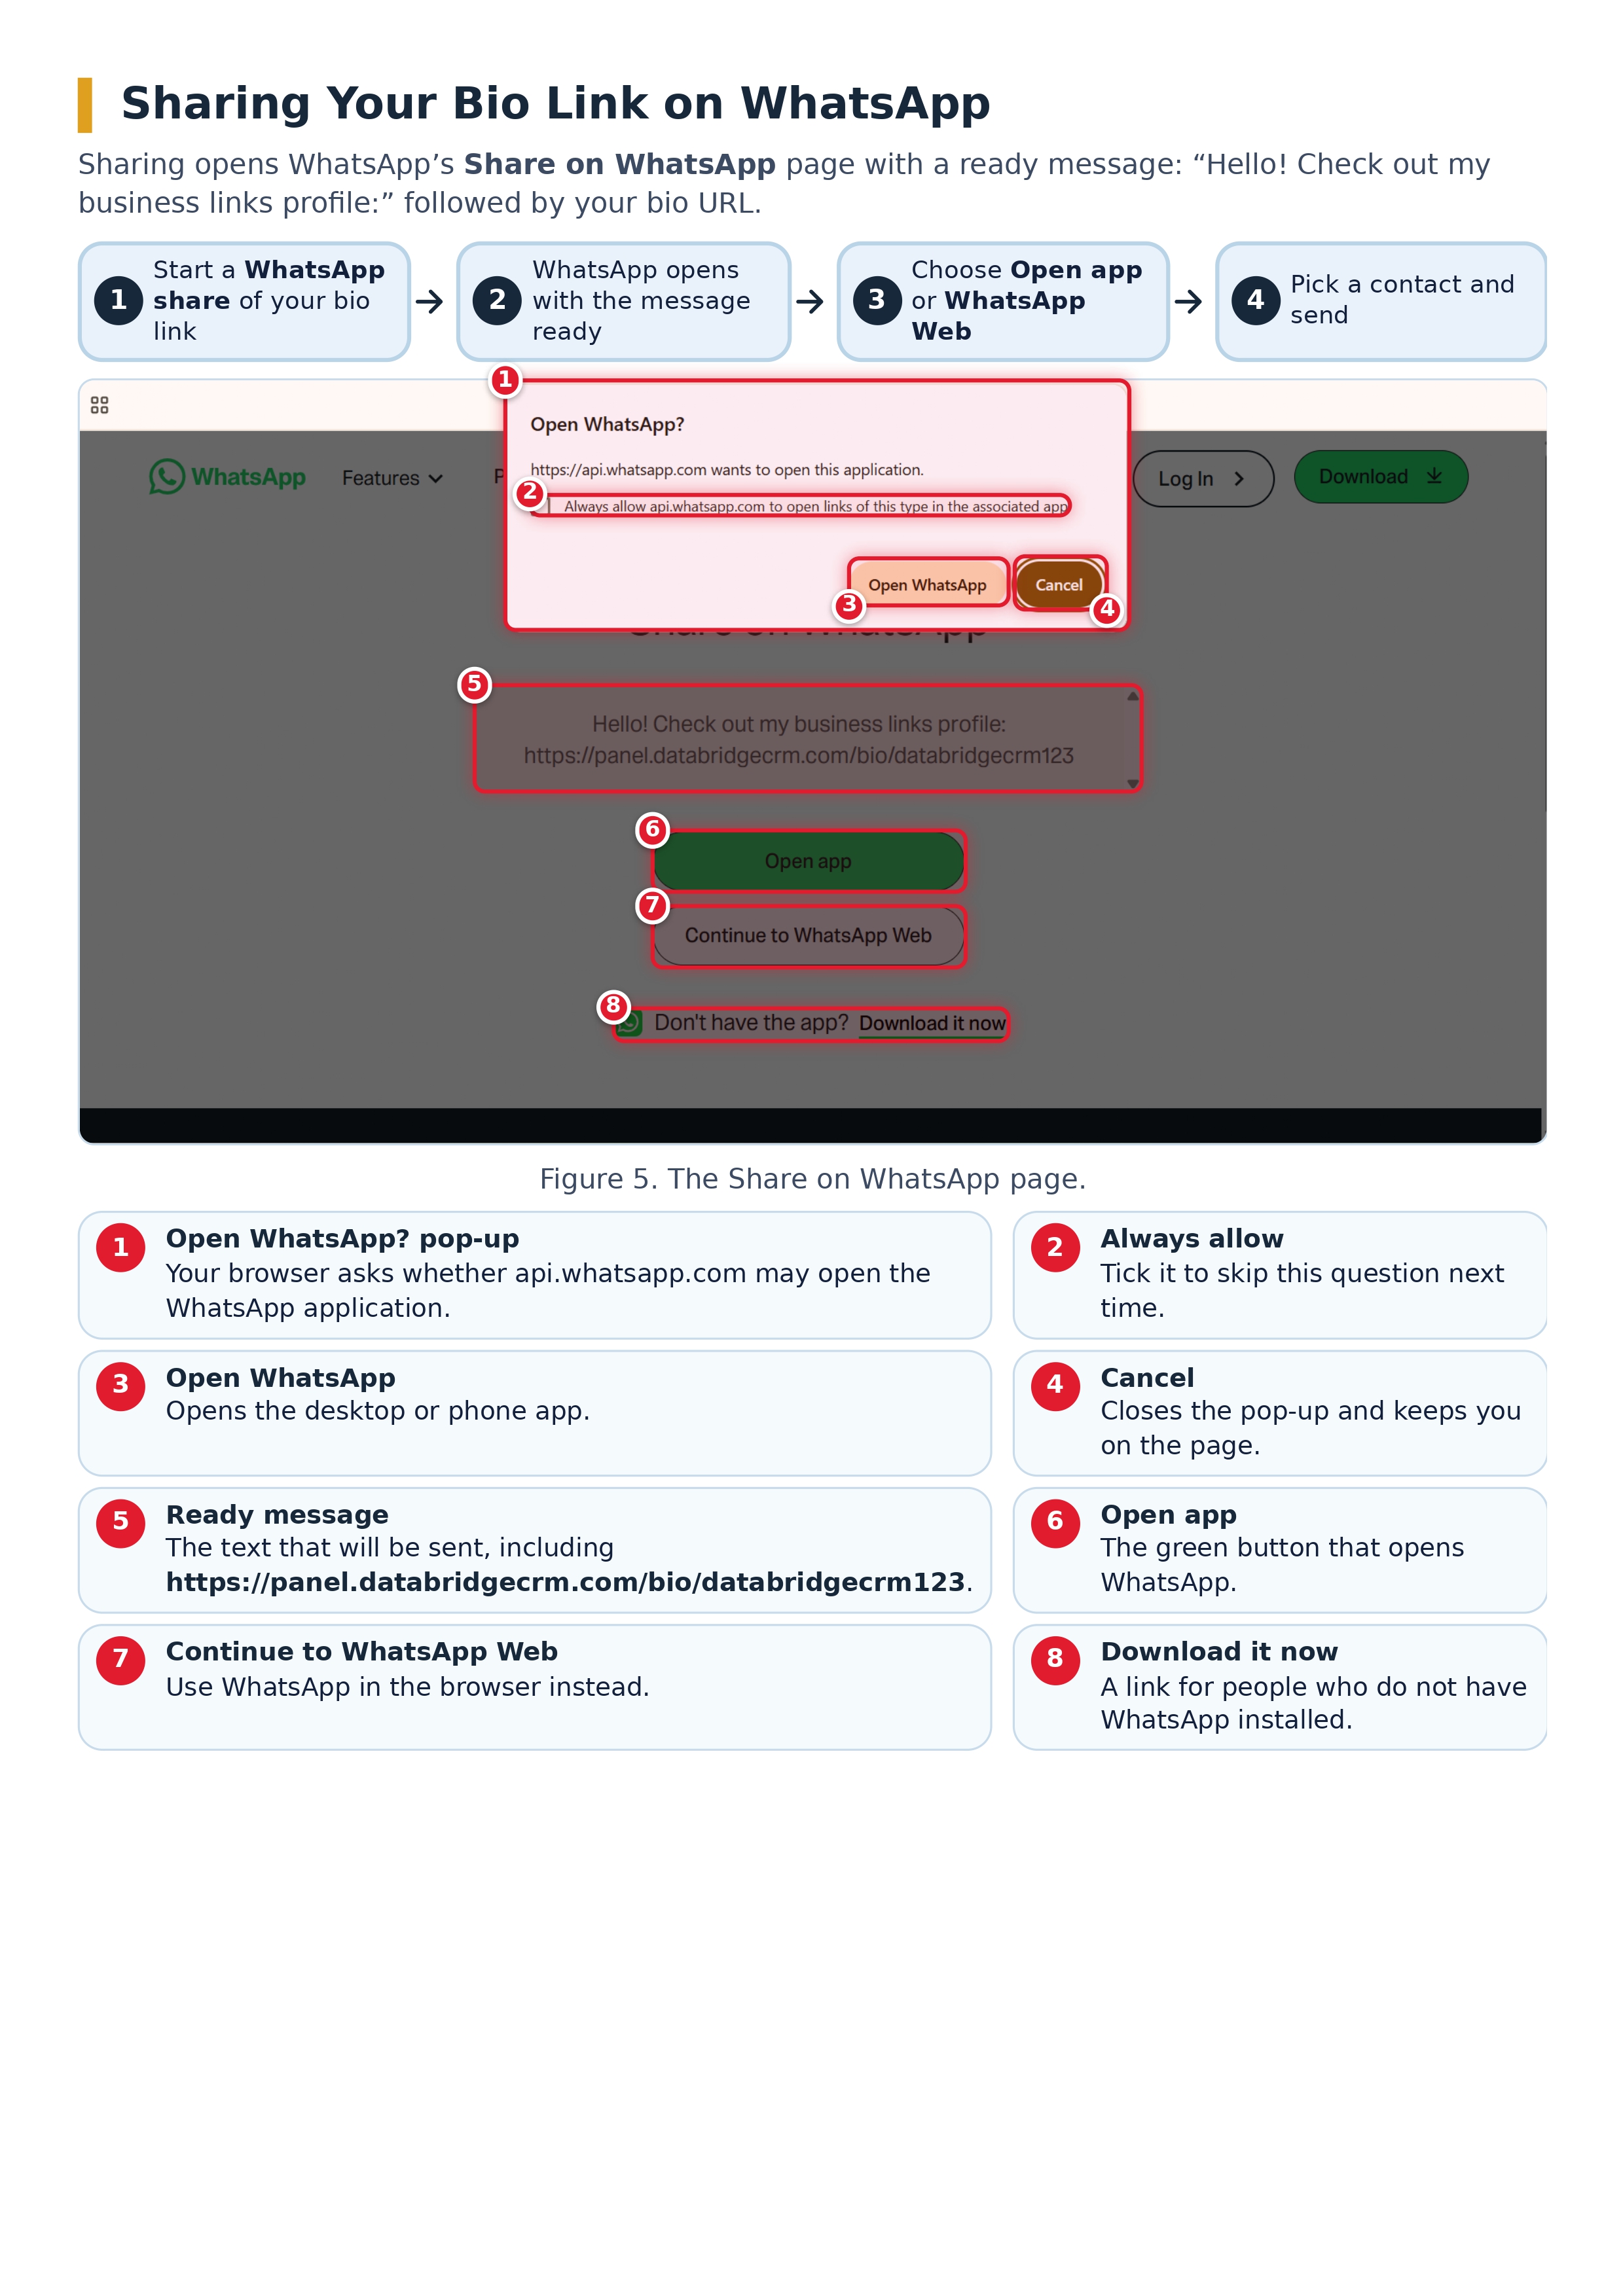
You can also share the page on WhatsApp. WhatsApp opens with a ready message: “Hello! Check out my business links profile:” followed by your bio URL. Your browser may ask permission to open WhatsApp, and you can choose Open app or Continue to WhatsApp Web.
Step 3: Build your product catalog
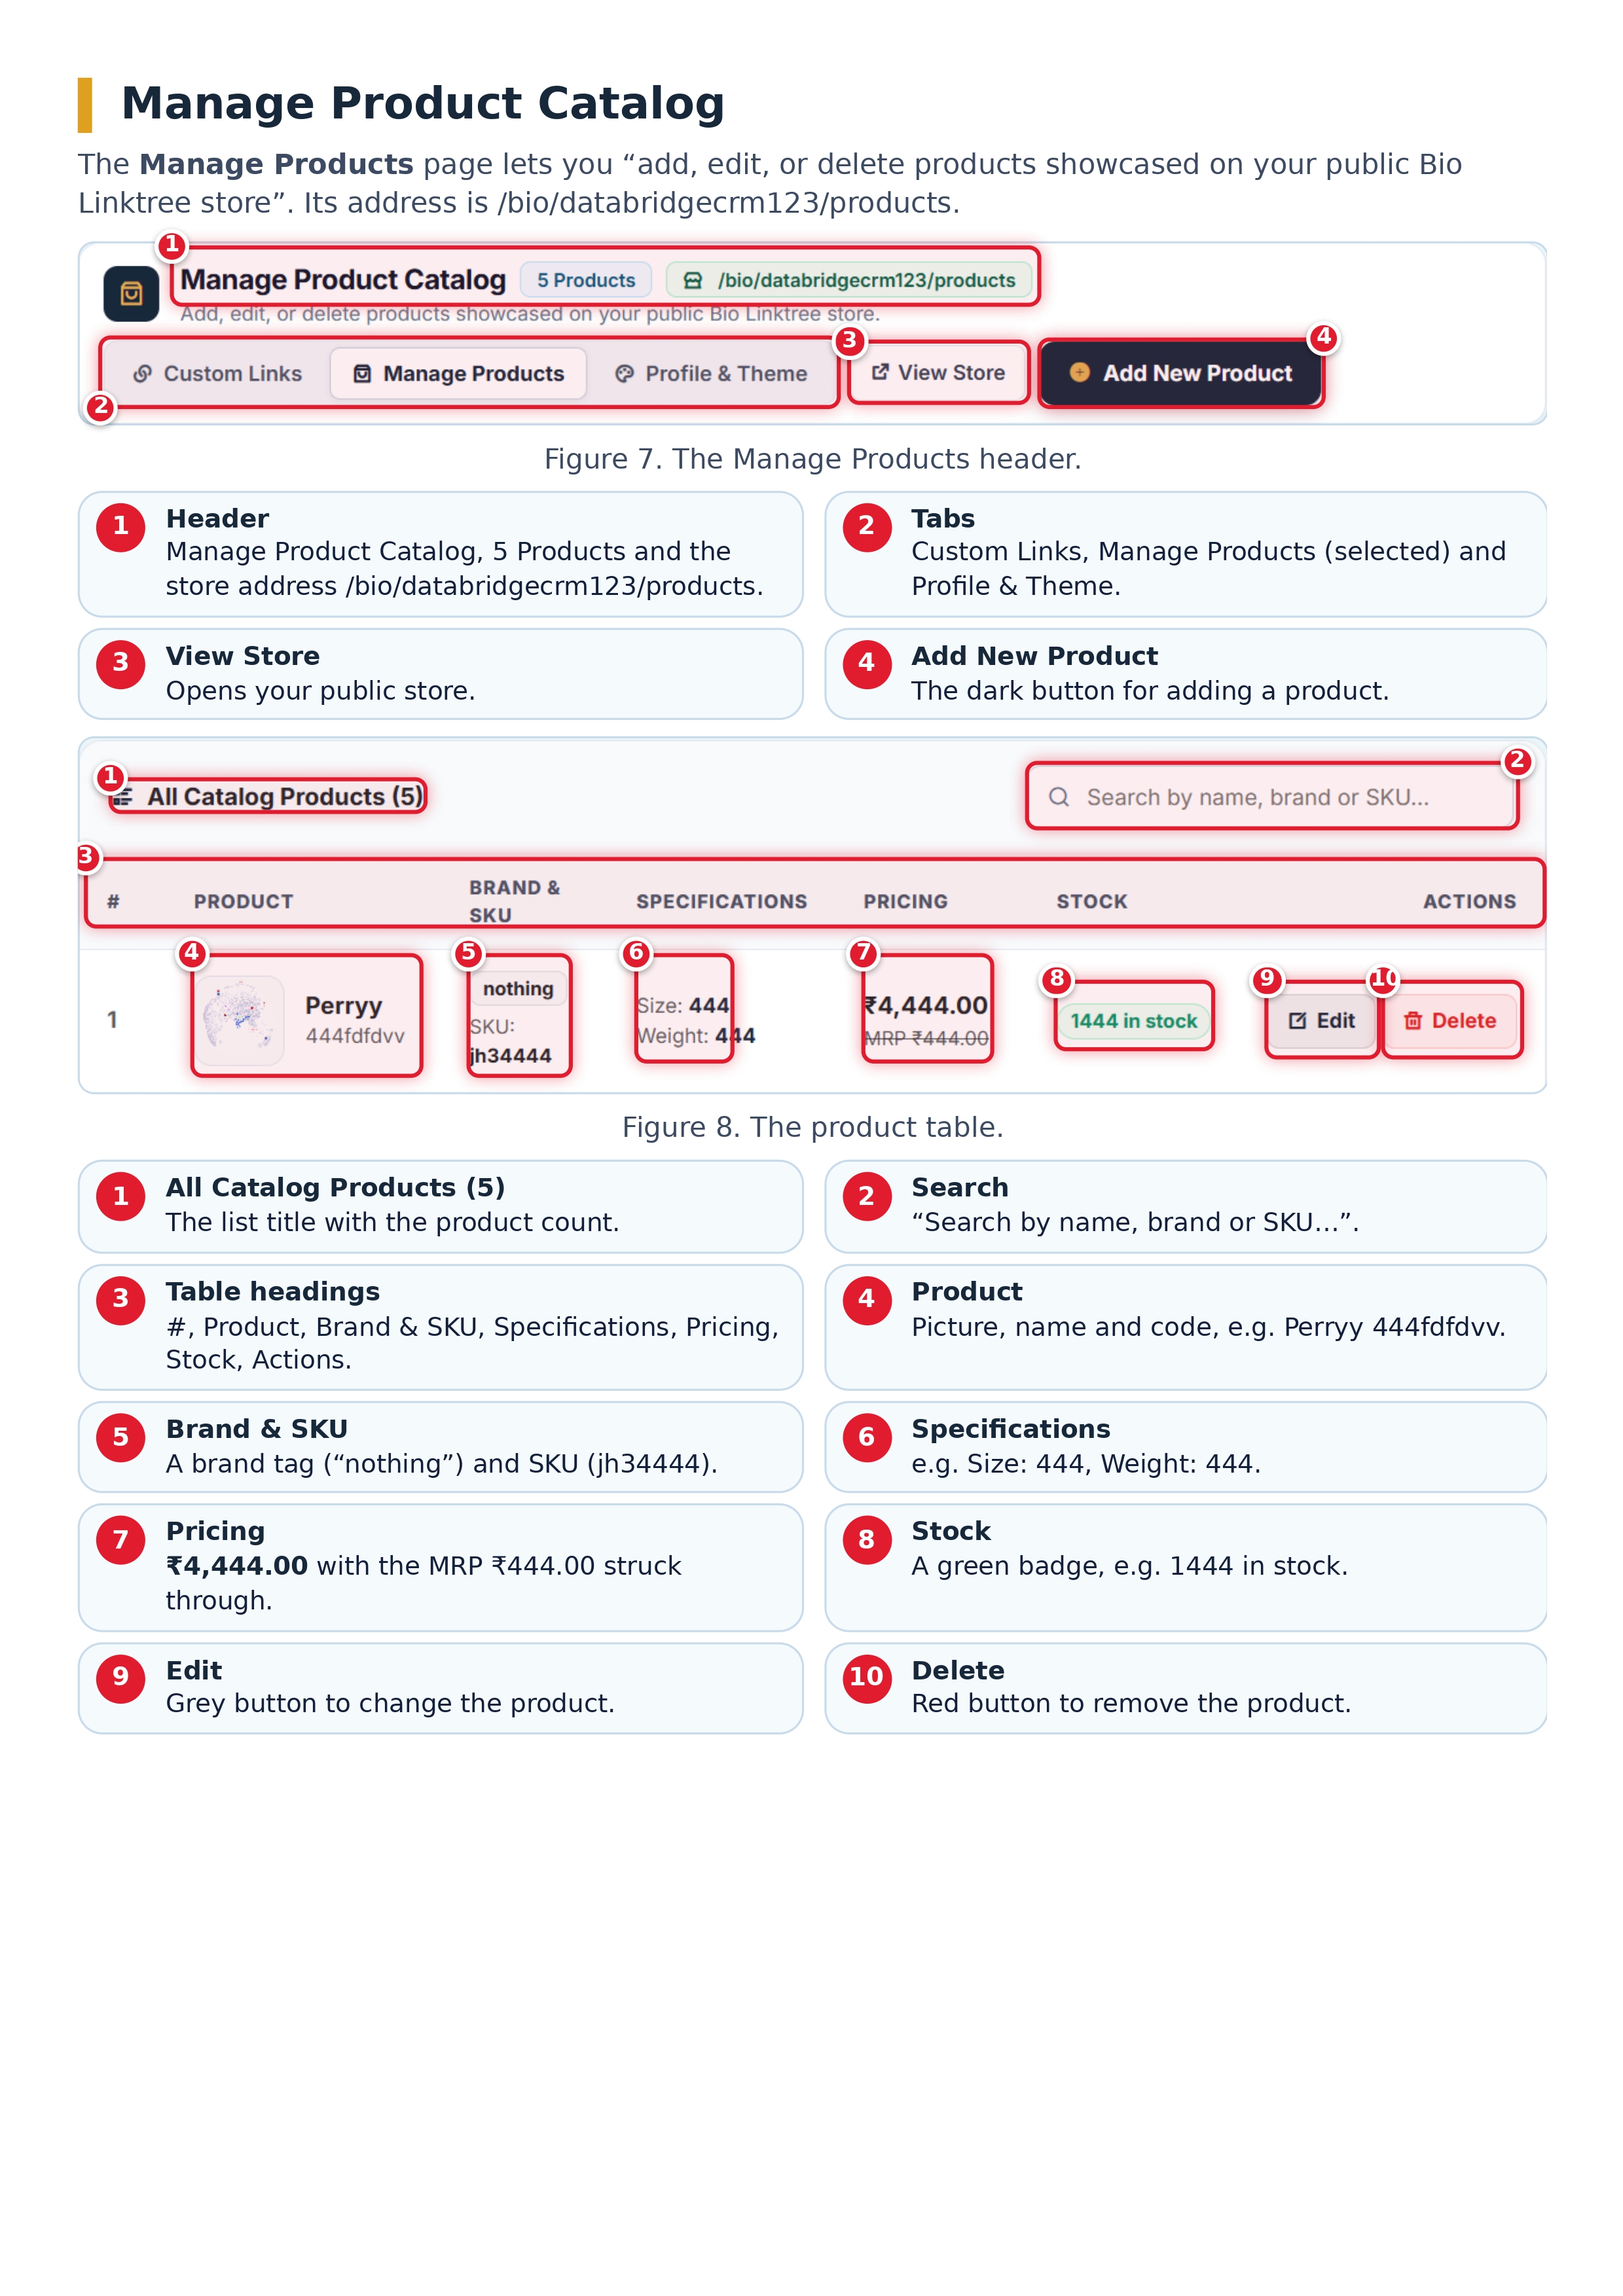
Open Manage Products to add, edit or delete the products shown on your public store. The table has these columns:
- Product: picture, name and code.
- Brand & SKU: brand tag and SKU number.
- Specifications: details like size and weight.
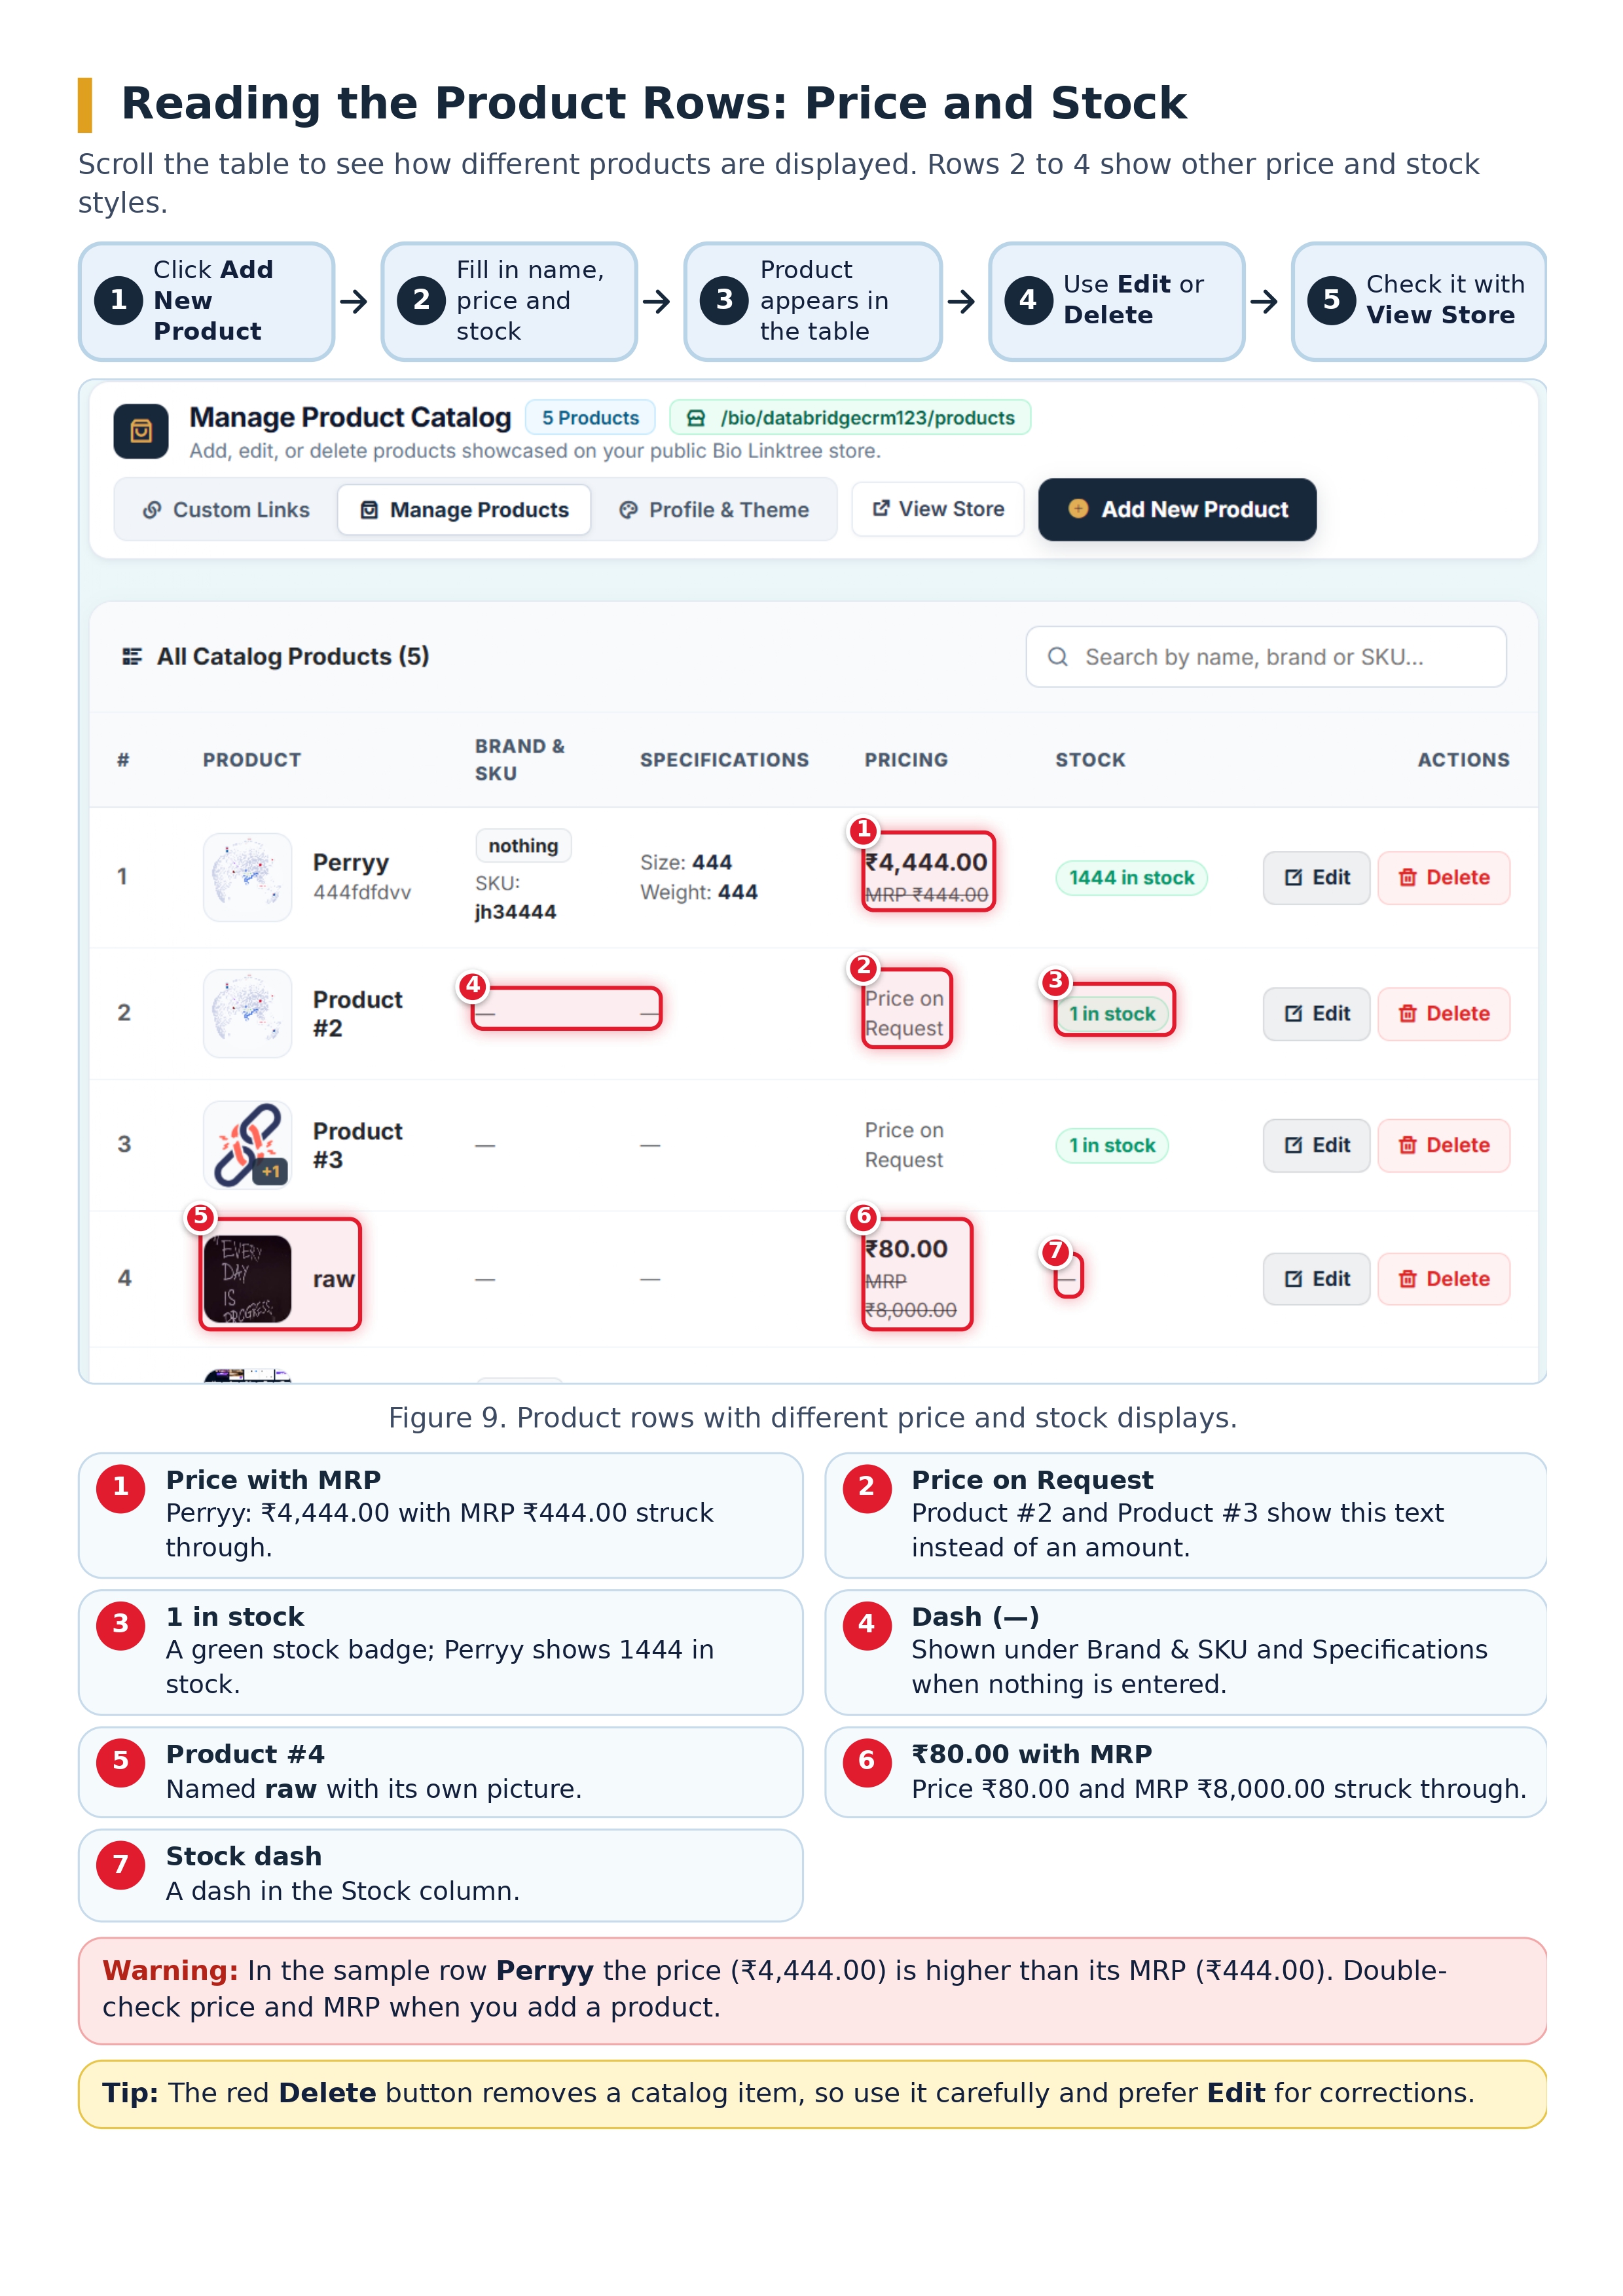
- Pricing: your price, with the MRP shown struck through.
- Stock: a badge such as “1444 in stock”.
- Actions: Edit and Delete buttons.
You can search the list by name, brand or SKU. Products without a price show Price on Request, which suits custom-quoted items. Use View Store to see your public store, and Add New Product to add items.
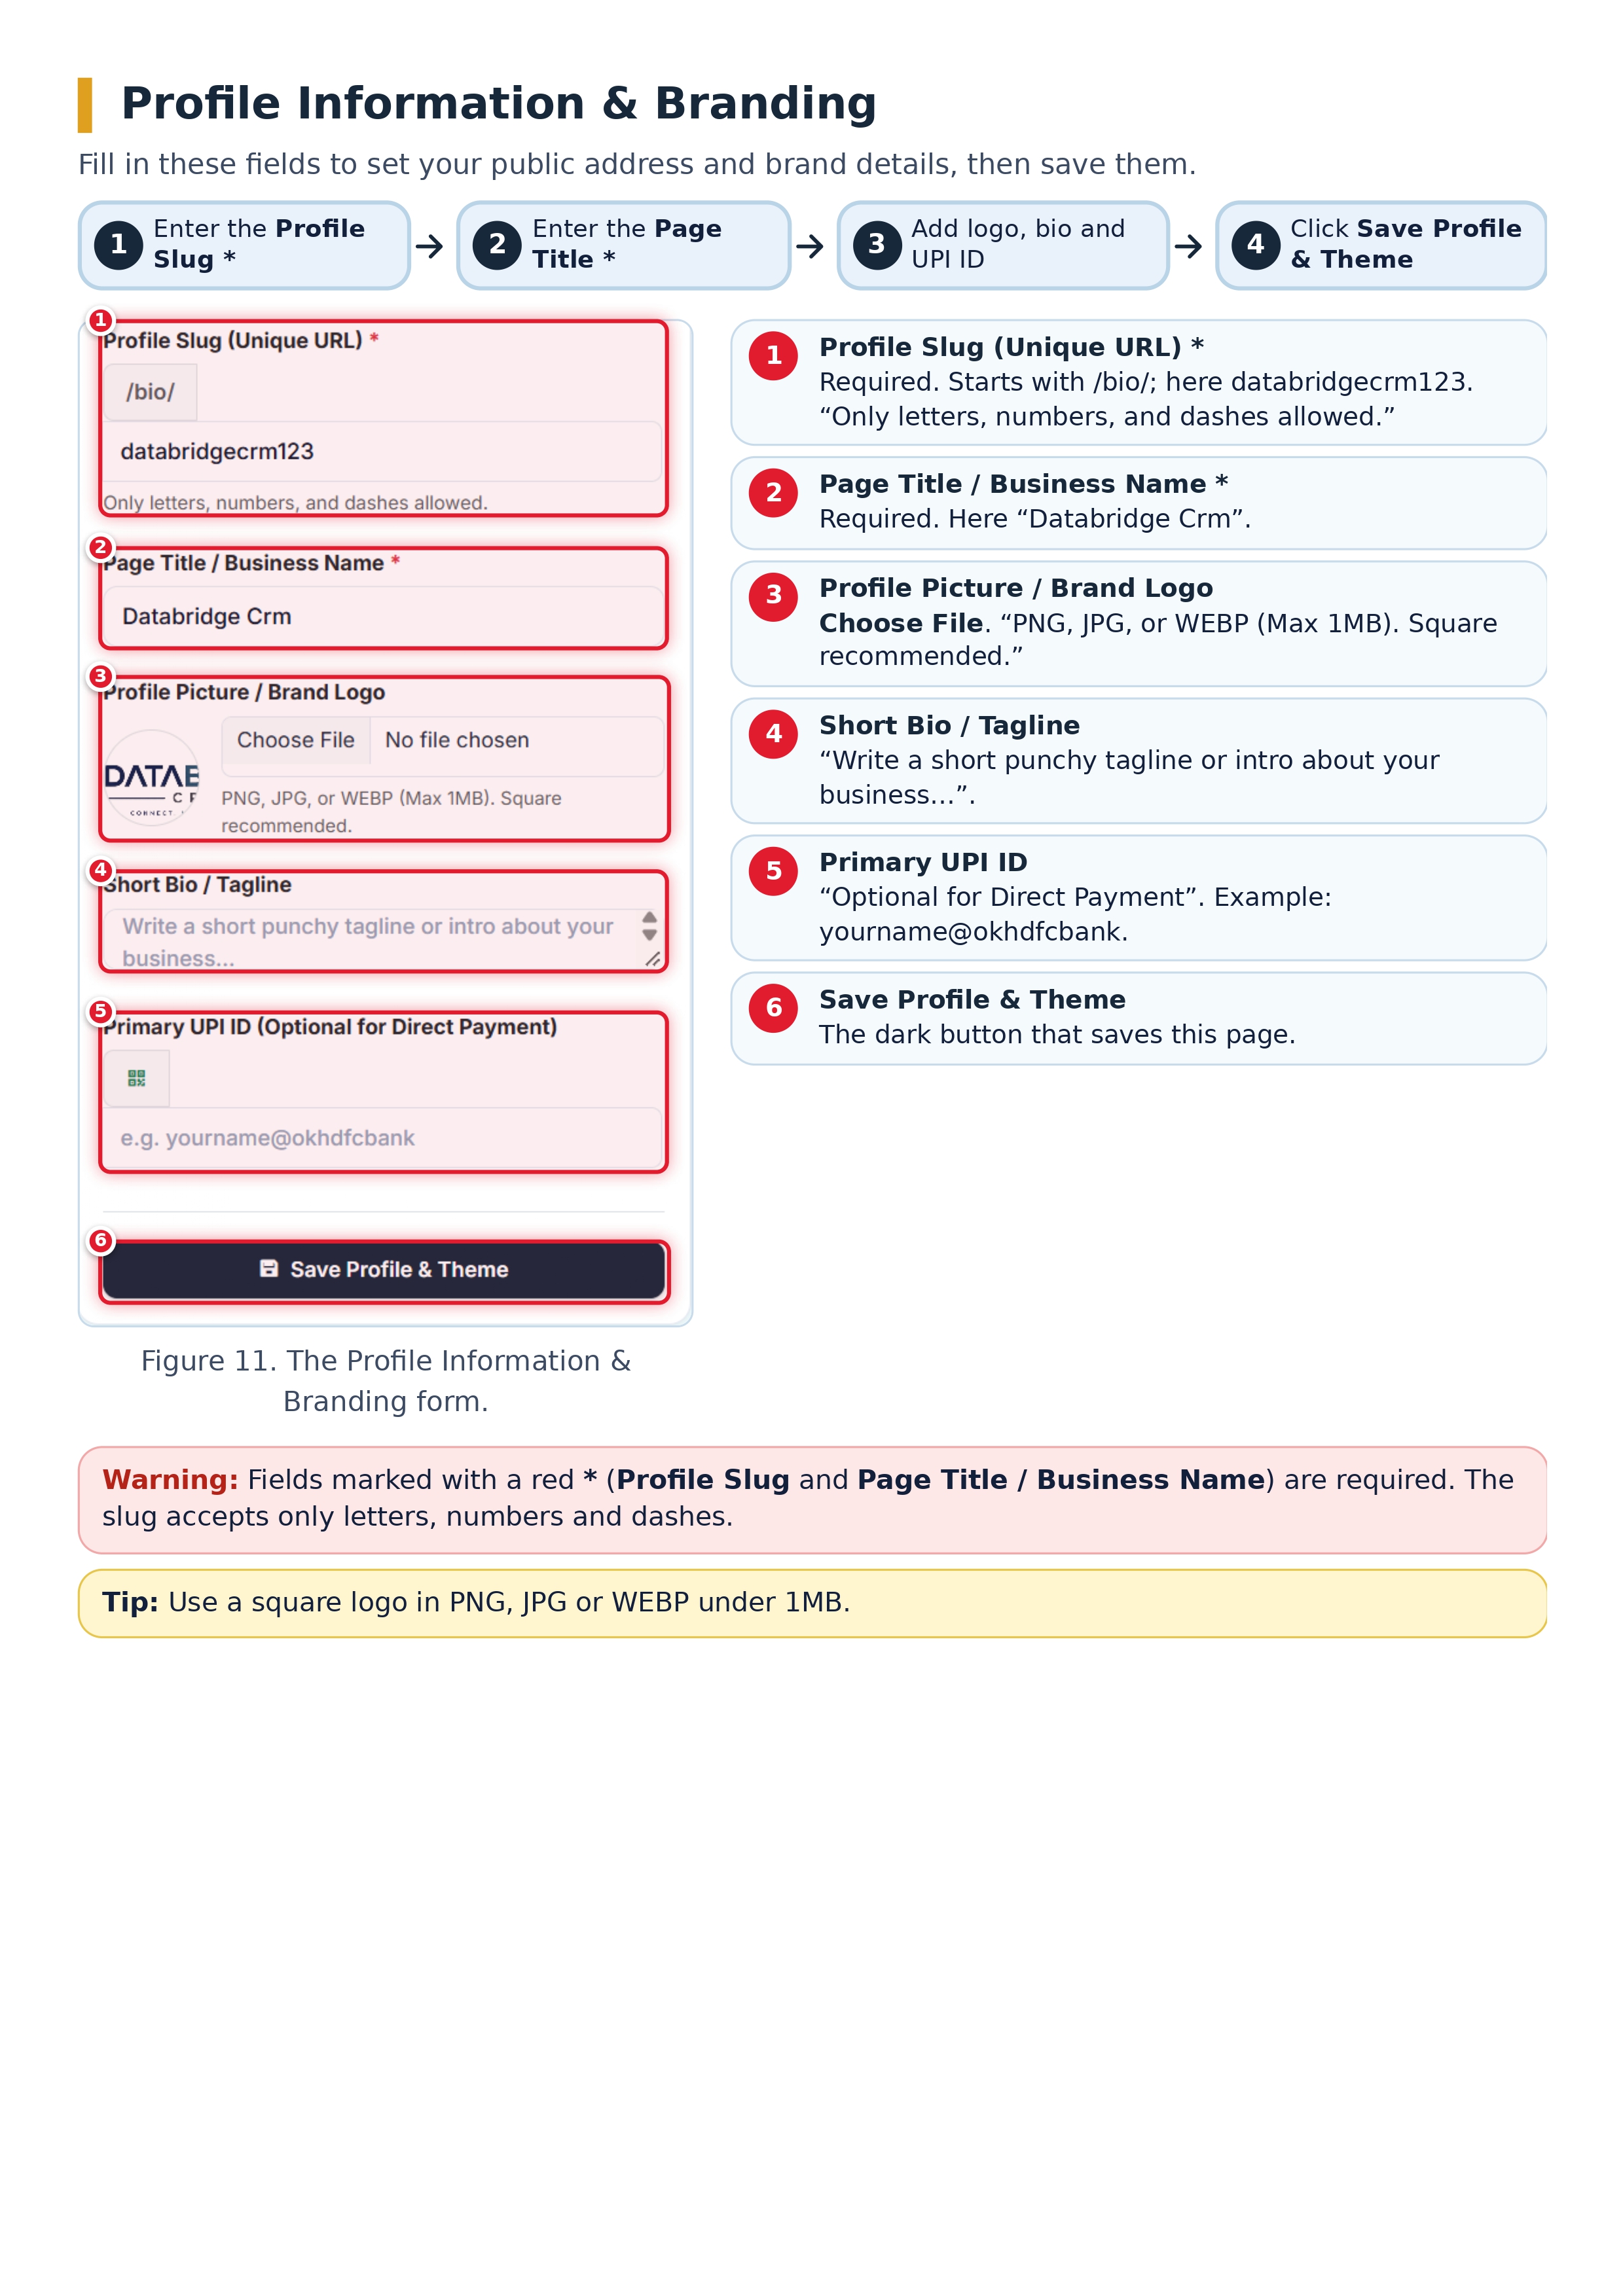
Step 4: Set your profile and brand
The Profile & Theme tab controls how your page looks and what it is called:
- Profile Slug (Unique URL): required, and it accepts only letters, numbers and dashes.
- Page Title / Business Name: required.
- Profile Picture / Brand Logo: PNG, JPG or WEBP, maximum 1MB, square recommended.
- Short Bio / Tagline: a short intro about your business.
- Primary UPI ID: optional, for direct payment.
Click Save Profile & Theme when you finish.
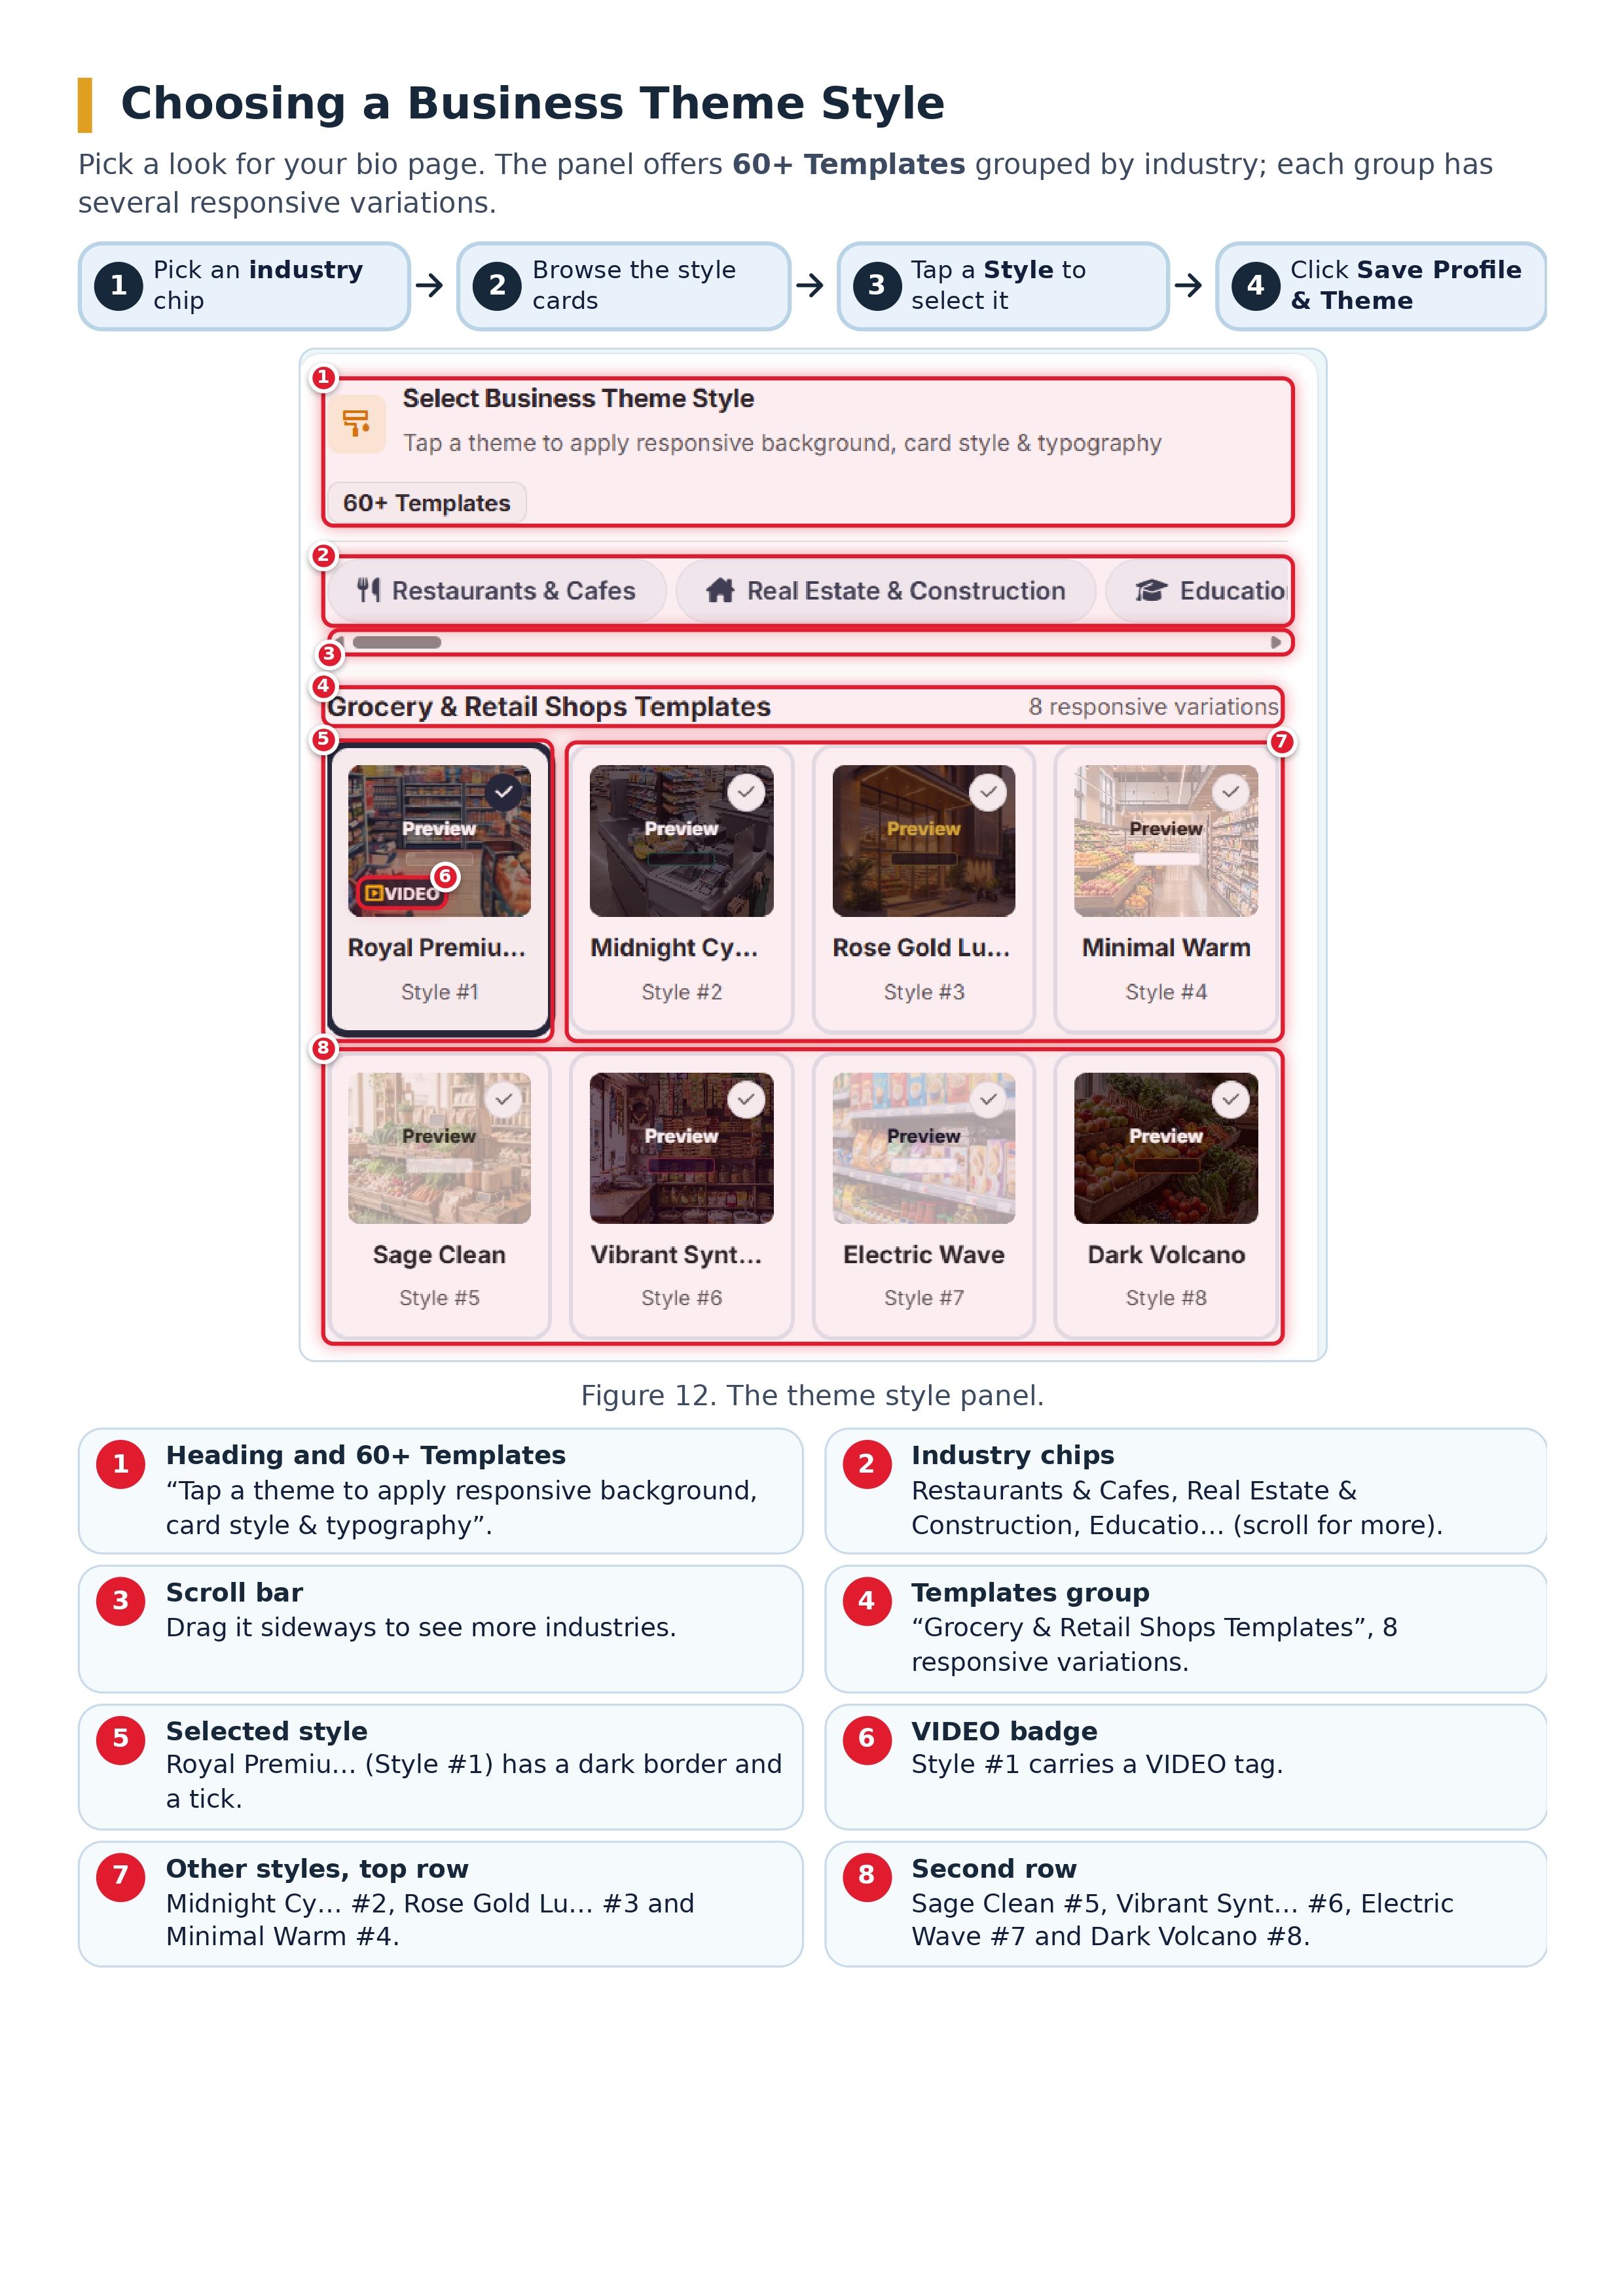
Step 5: Pick a theme
DataBridge CRM offers 60+ responsive theme templates across 9 industry sections, such as Restaurants & Cafes, Real Estate & Construction and Education. The sample page uses Grocery & Retail Shops, which has 8 style variations, including Royal Premium (Style #1), Minimal Warm (Style #4) and Dark Volcano (Style #8). Tap a style card to select it, then save.
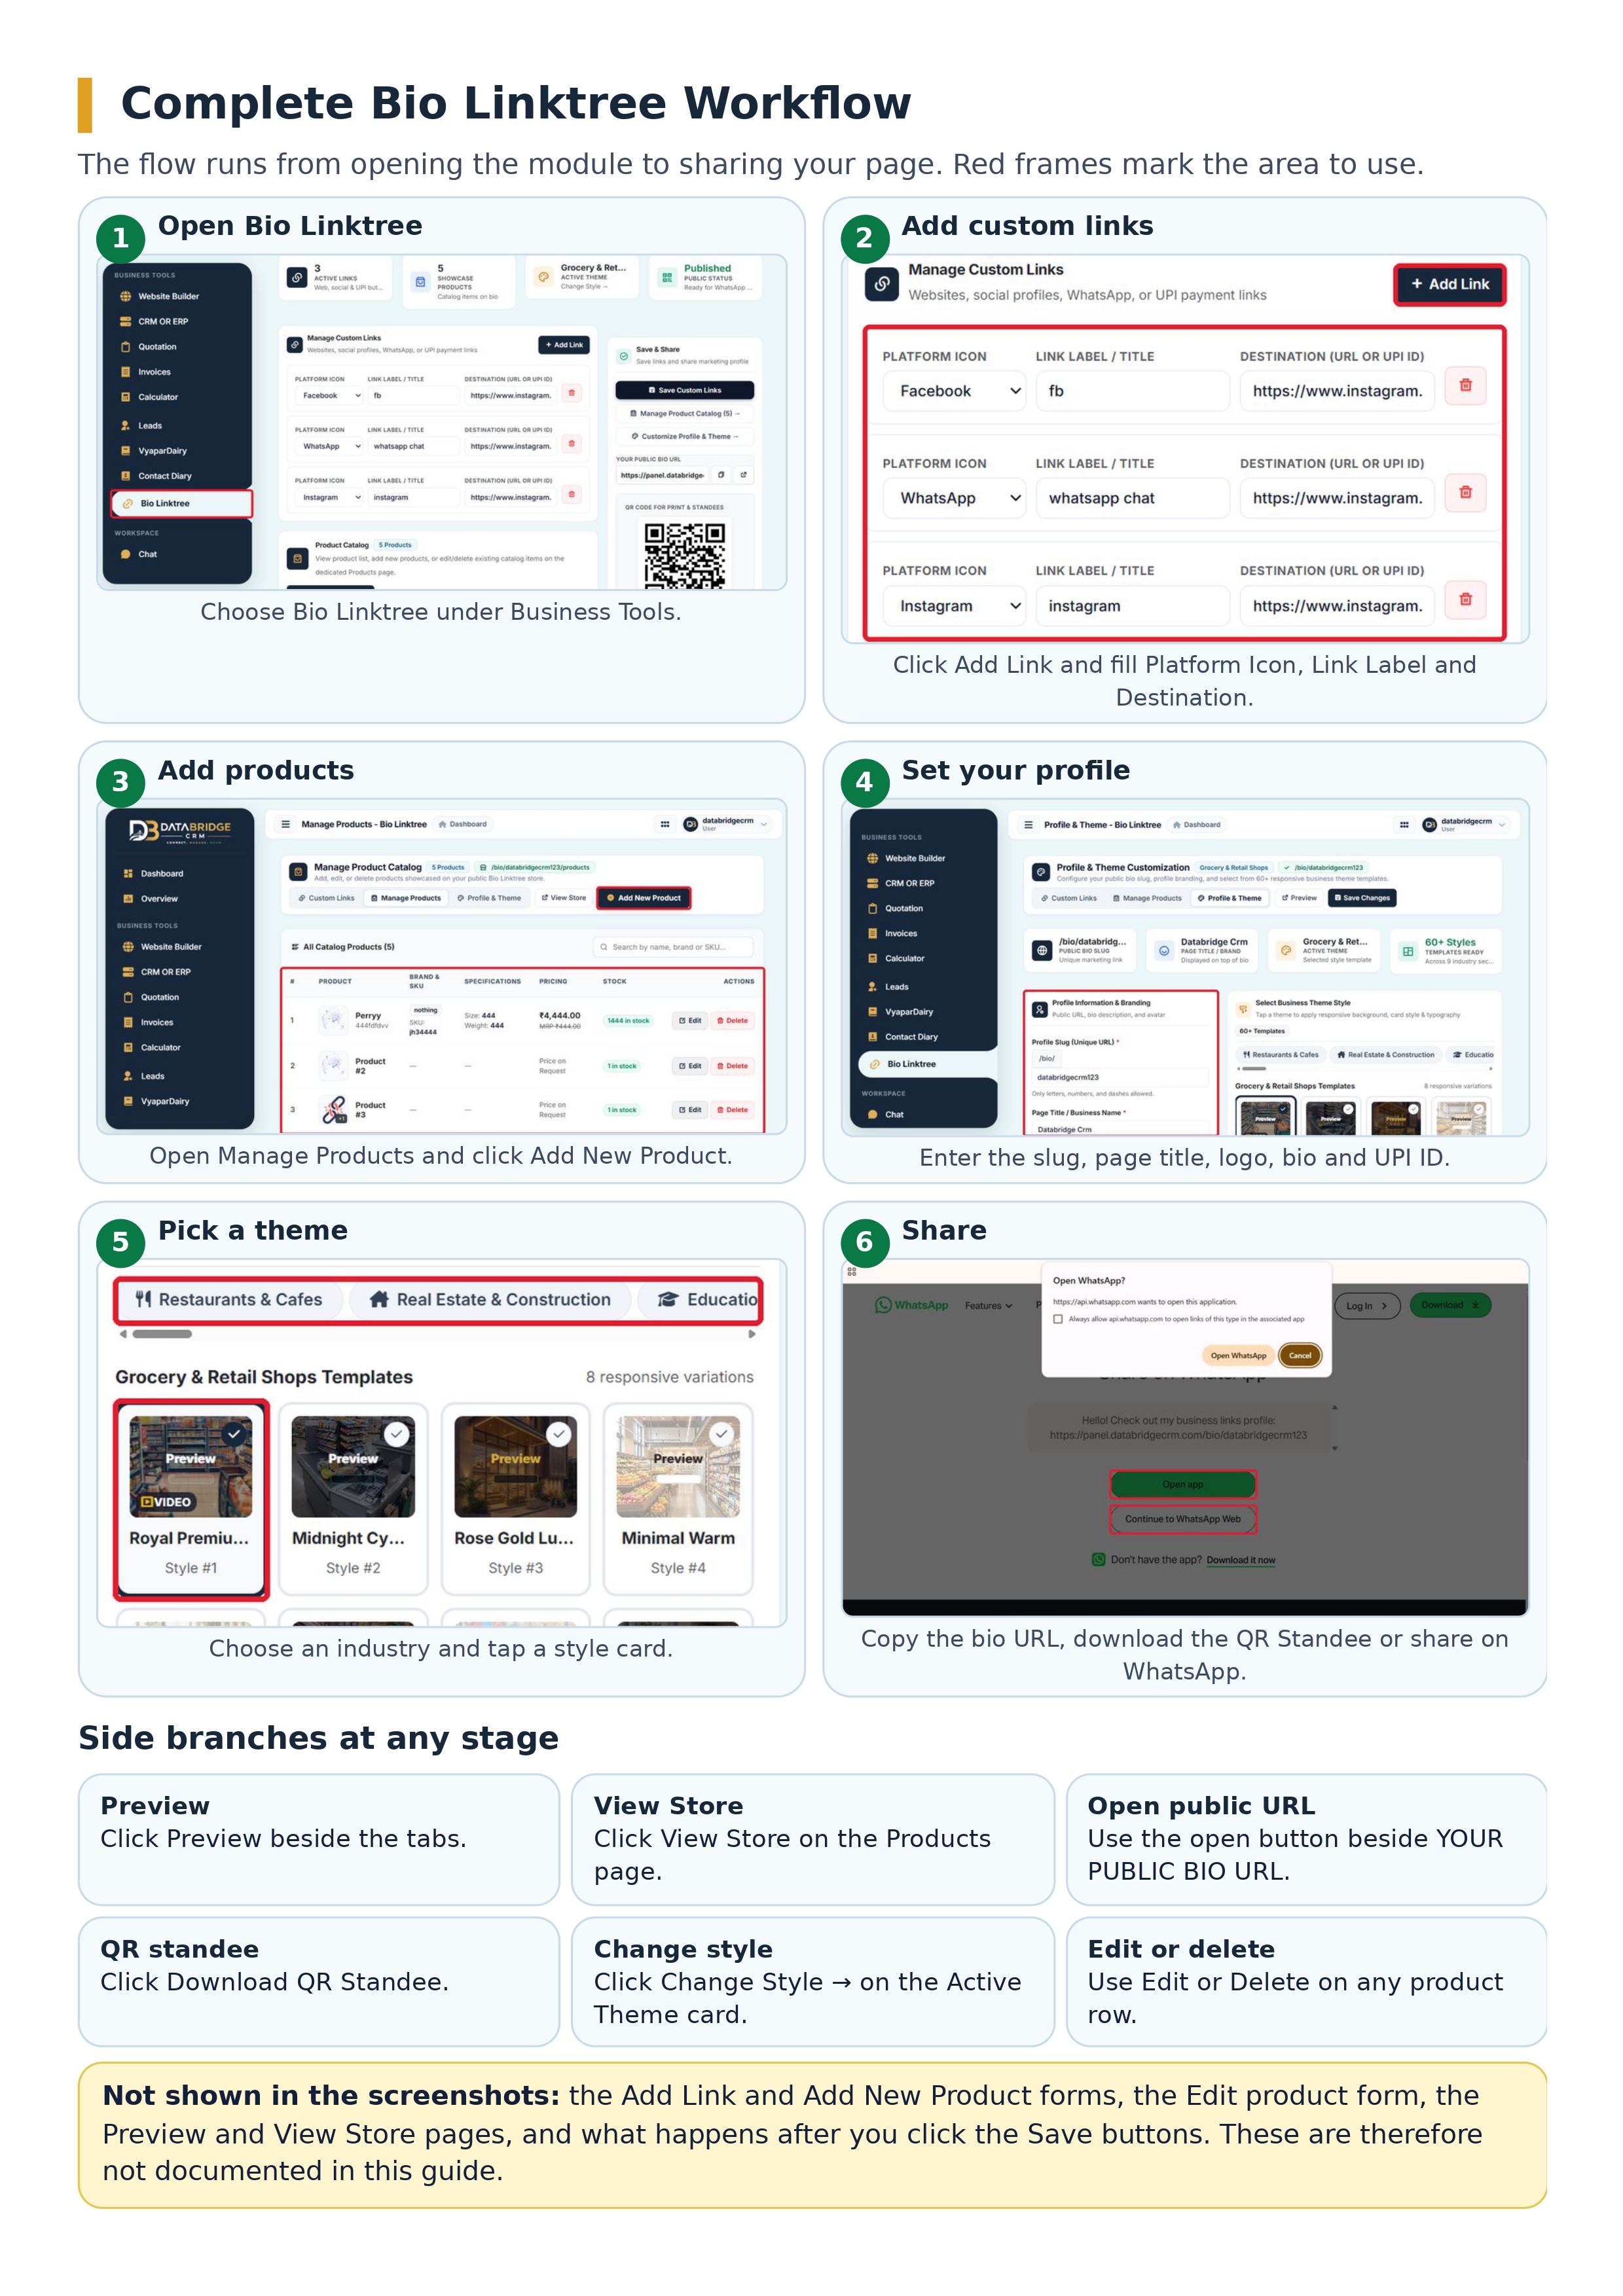
Quick setup checklist
- Open Bio Linktree under Business Tools.
- Add your links and click Save Custom Links.
- Add products in Manage Products.
- Fill in your profile and choose a theme.
- Copy your bio URL, download the QR standee, or share on WhatsApp.
Frequently asked questions
What can I add as a custom link?
Websites, social profiles, WhatsApp and UPI payment links.
Can I put my products on the same page?
Yes. The product catalog appears on your public Bio Linktree store.
Can customers scan to open my page?
Yes. The module creates a QR code you can download as a QR standee for print.
Can I change my design later?
Yes. Use the Change Style link on the Active Theme card, or open the Profile & Theme tab.
Conclusion
Bio Linktree turns scattered links into one clean business page with a product catalog, UPI option, QR code and WhatsApp sharing.

